Tag: nbsp

  • Linux Mint is not losing it’s ground over Ubuntu distros

    Recently, there were lots of rumors floating around that Linux Mint is dominating over Ubuntu distros. The reports and graphs collected by “DistroWatch” stirred up the arguments even higher. 

    People supporting this phenomenon, referred to an even bigger increase in Linux Mint’s DistroWatch ranking, a chart derived from the number of hits each distro page on the site receives. 

    Like a domino effect of misinformation, this week has been chock full of reports by tech news sites that Ubuntu’s market share is declining, being surpassed by the Ubuntu spin-off and close cousin Linux-Mint.

    The source of this dramatic revelation is none other than DistroWatch, the site that all Ubuntu haters love to quote, and all Ubuntu lovers love to hate. – Joey sneddon, author OMG! Ubuntu

    To talk about the facts, we should notice what Distrowatch is claiming in their graphs and reports. The Data is collected from their own website and the user who visit their pages. Actually they store the information of the visitors who register a hit on their page (which cannot be taken as any official reports or something which can be a source for some conclusion).

    Putting aside the fact that Linux Mint’s recent increase in “Page hits” on the site has been helped in part by blog after blog talking about/linking to Mint on Distrowatch as evidence of its rise against Ubuntu. There is no doubt that Linux Mint is attracting renewed attention.

    But many in camp Mint/camp anti-Unity claim that the distro is now well on its way to being, if it’s not already, more popular than Ubuntu. One infamous ‘opensource’ site with a notable distaste for Ubuntu’s Unity desktop even assures its readers that:

    “There is no way that Ubuntu will cover this distance in the near future, unless they change something dramatically.”

    Well, if you are taking a website page hit as an evidence, why not talk about some other websites which can provide better information with Billions of hits per month? 

    Let’s say “Wikimedia”, can we get relevant information from that site? Well, we investigated a little bit and this is what we found.

    To help give perspective to the whole Mint Vs Ubuntu debate lets see what some real, hard stats say.

    The stats were posted on OMG! Ubuntu, which is quoted below:

    As ZDNet report, the Wikimedia Traffic Analysis Report of Operating Systems Visiting wikimedia Pages* in October 2011 show:

    * 16,924,000 hits from Ubuntu

    * 556,000 hits from Linux Mint


    Half a Billion computer using your OS is not a bad stat at all, but it does challenge the often aggressive posturing of many in the anti-Unity brigade that Unity has been nothing short of a disaster for Ubuntu.


    If we look fast-forward to look at Wikimedia stats fro December 2011 then things look even brighter for Ubuntu:-

    * 29,432,000 hits from Ubuntu

    * 624,000 hits from Linux Mint


    There’s a hralthy 68,000 hit increase from Linux Mint users – certainly indicating a surge in its use. But look at Ubuntu – almost 13 million hits up from October, which, perhaps not coincidentally, saw the release of Ubuntu 11.10

    Linux Mint is definitely, one of the best Distros out there, which comprises huge dedicated developers swarm and a group of loyal followers thoughout the world, but getting on to a conclusion that Ubuntu is loosing it’s ground just because of it’s “co-distro” will not be a reasonable and noble effort. 


    Source: OMG! Ubuntu, Wikipedia

  • 10 valentine’s day Gadgets for your Geeky Girlfriend

    10 valentine’s day Gadgets for your Geeky Girlfriend

    This is a “Valentine’s day” week, and DigitFreak is celebrating. We are trying to help you by sorting out the 10 best gadgets for your friends (we do your work to makes your life easier). 

    So what are you planning to gift your Girlfriend this valentine’s day? is it something which is too formal? don’t you think you should do something which doesn’t falls in the category of “similar” or “common” block? 

    Folks, gone are the days where people used to gift only flowers and confectioneries, now we are living in 21 Century, the age of state of the art technology where almost everything has been made easy, thanks to the small to big gadgets and gizmos.

    Here are the 10 Gadgets which you can gift your Girlfriend(s) (oops!) on this occasion:


    1. Holga iPhone lens

    1-holga-lens-valentineA fun and quirky iPhone accessory perfect for mobile photography lovers, the Holga Lens has nine different toy camera lenses that give you a range of effects, like

    vignettes and vibrant colours.

    Price: ~ $29 Get it now!


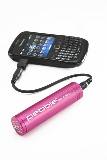
    2. Pebble Smartstick

    2-pebble-stickThe Pebble Smartstick is a super compact gadget for keeping all kinds of devices charged on the go and comes with five different adapter tips. There are plenty of backup battery packs on the market, but this one is cute, compact and look, look it comes in pink…

    Price: ~ $30 Get it now!


    3. Jawbone Jambox Speaker

    3-jawbonejamboxThis powerful wireless speaker from Jawbone allows you to stream tunes via any Bluetooth connection from your phone, computer or any other source and play your music LOUD. You can also add apps, change settings and update the software via the My Talk website.

    Price: ~ $174 Get it Now!


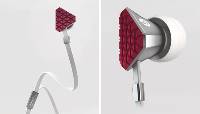
    4. Heartbeat Headphones by Lady Gaga

    4-heartbeats-lady-gaga-headphonesThe ‘Paparazzi’ singer has collaborated with Monster and came with Heartbeats headphones. These headphones are specially made to offer high-end sonic clarity and also a lively bass that will do justice to any track. This can be an ideal gift for your women if she is a music enthusiast.

    Price: ~ $70 Get it Now!


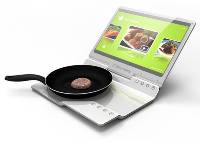
    5. Electrolux Laptop Kitchen

    5-electrolux-laptop-kitchen-conceptDo your Girlfriend manage home and you both? If yes the newest state of the art Electrolux Laptop Kitchen is the best one for your Girlfriend. This new technology will let your girlfriend cook and do office work together, how? Simple, the kitchen stove has touchscreen display that has in-built Wi-Fi, 3G with stove attached to it. Great isn’t it!


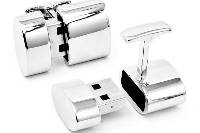
    6. Brookstone Wifi and 2GB USB Cufflinks

    6-Brookstone-cufflinksIf you and your Girlfriend regularly attend formal parties, travel and love technology, you need these swanky cufflinks in your lives. Beneath the polished silver veneer, you’ll delightfully discover that one piece hides 2GB of USB storage, and the other can be used as a Wi-Fi hotspot for multiple devices. All you have to do is download and install the companion software on your computer. Afterward, you’ll be able to connect your smartphone, iPad or any other wireless device to the available network.


    7. iNecklace

    iNecklace-544x311pxThe iNecklace from Adafruit is a quirky little flashing on/off button pendant, which

    would make a cute novelty gift for geeks.

    The iNecklace is completely open source too, meaning the circuit board and CAD

    files can be hacked and altered, so you can play around with how the light flashes.

    Price: ~$75 Get it now!


    8. Sony DPF-D810 8-Inch SVGA LCD Digital

    8-Sony-DPF-D810-roomLooking for a simple digital photo frame to show off pictures of you and your Girlfriend as a happy couple? This Valentine’s day, the Sony DPF-D810 is your best bet. The 8-inch device sports a 800 x 600-pixel display and delivers clear, crisp and bright photographs. You can exhibit photos either one by one, or as a slideshow with your choice of time interval (anywhere from three seconds to 24 hours) and your choice of six transition effects. You can even display a clock or calendar along with your pictures.

    price: ~$130 Get it now!


    9. Smart Candles

    9-smart-candlesTo appeal to her romantic side (or to appease those with OCD tendencies) scoop up some Smart Candles. Fragrance, heat, and wax-free, the battery-operated LED lights will glow for up to 50 hours.

    Price: ~$22 Get it Now!


    10. Sound Asleep Speaker Blanket

    10-sound-asleep-speaker-blanketA blanketed fleece with sleeves and a hood that houses two removable speakers connected via a 3.5mm jack to plug into your MP3 player of choice, radios or televisions. Do you want to sleep now? i don’t think you will find it hard not to. !


    do you have any more ideas or something unique for your relatives or Girlfriend this Valentine’s day? Share it here!

  • How to improve Wi-Fi speed on iPhone/iPad/Ipod using Faster DNS

    How to improve Wi-Fi speed on iPhone/iPad/Ipod using Faster DNS

    You have a super high-speed connection and you are using it for all your browsing and content transfers. Are you frustrated of slow wi-fi connection on your iPhone/iPad/iPod? No matter what you do nothing gets you the full speed over the wireless network. But there are the ways, using which you can improve your wireless connection. 

    Here we will use Faster DNS to improve our wireless network efficiency a bit. For those who don’t know what DNS is : DNS stands for Domain Name System. The Domain Name System (DNS) is a hierarchical distributed naming system for computers, services, or any resource connected to the Internet or a private network. It associates various information with domain names assigned to each of the participating entities. Most importantly, it translates domain names meaningful to humans into the numerical identifiers associated with networking equipment for the purpose of locating and addressing these devices worldwide.

    Steps:

    1.  open Settings and Click on WiFi.

    2. Select the network for which you want to set Custom DNS.

    3. Tap the Numbers in DNS and write the custom DNS server.

    You can add different DNS Address, you can use NameBench on your Windows, Mac or Linux Computer to find out the best suitable DNS address according to geographical position. However, two DNS servers are very much reliable and faster.

    you can use them alternatively:

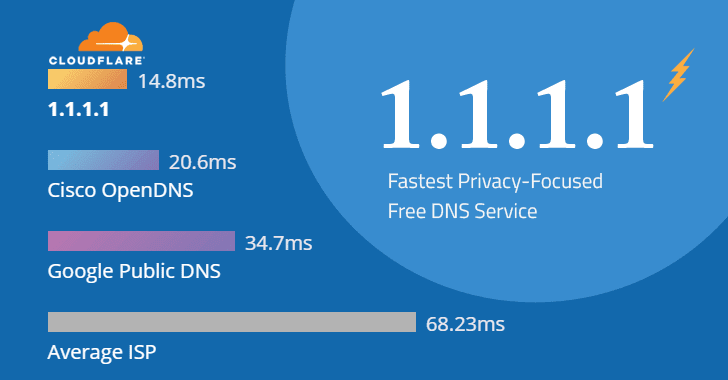
    Cloudflare DNS Servers: 1.1.1.1 and 1.0.0.1
    Google DNS servers: 8.8.8.8 and 8.8.4.4
    OpenDNS servers: 208.67.222.222 and 208.67.220.220


    #Tip:

    This is particularly useful for the users who have older devices such as iPhone 2G , 3G but it may be help for iPhone 4/4S/iPad 2 and above.

  • Want to download files using IDM in Ubuntu, huh?

    Want to download files using IDM in Ubuntu, huh?

    A Few nights ago, I was searching for porn on internet (For which I am very popular!) and I found a great kickass video which I needed to download. Fortunately, I got the direct link for that video, but the file size was too big and I knew that if any interruptions happened then I will not be able to resume my download again.

    Then my search for a resumable GUI Download manager started. At the beginning when i shifted to Ubuntu, like all the other desperate windows users I also tried to install IDM using wine but failed. Very little did I know that the real solution was hidden within the same software. It was the start of my mission and That night I was searching for this kind of software everywhere. In Ubuntu software center, I even found an app named ‘kget’ with the same facilities like resumable download and all that usual shit but it was too big for my Urgent need. Finally, I started feeling hopeless that I would not be able to download this porn, and would forever miss this one.

    I don’t know how but I felt the urge to crawl online for any other methods or ways to download the files just the way IDM does. And There it was waiting for me in google’s Advanced search!

    So after all this foreplay what I found is that you can get the same old, same old app named “The great great IDM” working in Linux if and only if you have got wine installed and a setup file of “IDM Version 5.05“.


    Don’t worry if you don’t have it then I will get you there. I know that you are getting more desperate as i write each extra word. Without further ado, Click here if you want to download IDM v5.05(of course you do!). Don’t worry i am not kidding and also the file size is only 2 mb!

    Download_link# http://download.oldapps.com/IDM/idman505.exe

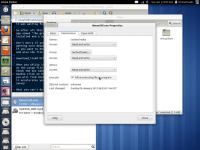
    After you shitty internet connection is done with this download, then right-click on the setup file and go in the properties menu. There under permissions tab, check the box named ‘allow executing file as a program‘.

    123

    And you are good to go.
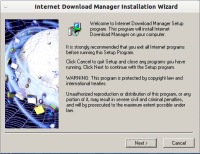
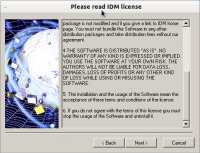
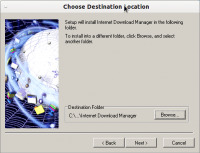
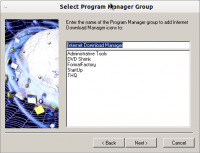
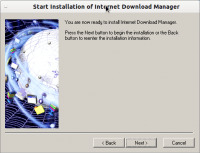
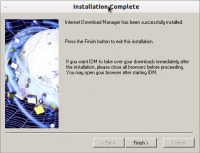
    Double click on the IDM setup and go through the normal installation process and you will find that it’s working just the same way. On top of that I found out that it accelerates your download speed up to twice as it did in my case! Isn’t that savvy?

    abc
    def

    If you don’t know where those files are being installed, don’t worry. There are here. Make a copy of the link for that folder if you wish on your desktop. Go to your home directory and there press ‘ctrl+H’. That’s how you show your hidden files in Ubuntu. Look for a directory named ‘.wine’. Inside that directory  you will see two folders. Open the folder named ‘drive_c’. You are now in your fake windows system drive and you see the familiar folders like windows and program files. Inside the program files you can find the installed files of any software that you have installed through wine.

    What you can’t do in this Forced installation?
    Don’t be afraid!, its not like i am gonna write that you won’t be able to download anything at all, just to see the IDM window. lol!. Now You don’t have the download panel property in this version. So you will need to have a direct download link to download any file. Also Even if you try to Force any download using the ‘force download keys‘ option, its all gonna be a waste.

    You will  also need to register this version of IDM if you want to use it longer than one month.

    Ok! Fine. I am going to help you here also, but this is the last time. If you have eyes then you must have noticed something glowing in he text below. It’s not my effing phone number! GOD! you guys are like kids. Thats the registration key for IDM. In the ‘help’ menu of you IDM select the ‘Registration’ option. The registration dialog opens and there insert whatever you wish in the names and email ID, along with the key in the respective boxes(what else did you think were we going to do? huh?). And when you are done you will see that its registered!

    Key# HFLUV-FRUKA-2R7U7-GLHQ1

    hurrah!

    I believe, that after this tutorial(ass whooping) all you of you people are happy and enjoying all the porn, shit! sorry . I mean you are all downloading all that you wish without any interruptions, and time limits. (just the way i enjoyed my night)!


    In the end, let’s take some credits. Let’s see..

    1. You had to download only 2MBs instead of 60MBs! that kget needed you to download.

    2. You enjoy the whole IDM features and registration just for nothing more than your one visit to Digitfreak.

    3. You got introduced to the coolest person alive for free!

    4. And add all the things that you want to thank me for in the list that has no end whatsoever..lol

    “WHY FEAR, WHEN ‘the dude‘ IS HERE” – Timamirrockdude

    [Note: Don’t ask me for that porn video link now! Btw it was really nice and HD sized 232MB only!. Ain’t that great!]

  • Things you can do after installing Ubuntu 11.10

    Things you can do after installing Ubuntu 11.10

    Ubuntu 11.10 is quite a large over-ripped (and wrapped) version of it’s predecessor. The new Ubuntu 11.10 Oneiric ocelot was released on Oct 13th 2011. I have been using Ubuntu 11.10 since it’s release (and even before, when alha 1 was released). Ever since the arrival of Unity, many new and old Ubuntu users are looking for ways to improve the functionality aspect of Ubuntu and customize the Unity environment to their respective needs. Here are the few tips and tricks you can opt for, for your new Ubuntu 11.10 :


    1) Installing Restricted extras during Installation

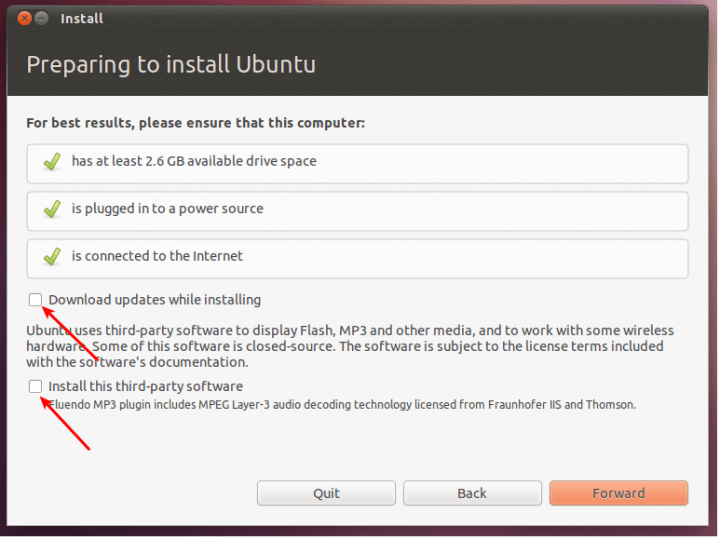
    * Starting from Ubuntu 11.04 release, you can install restricted codecs package(which include Adobe Flash, MP3 codecs and such) during installation of Ubuntu OS itself.

    Screenshot* Notice the arrows pointing to the boxes in the screenshot above. If you tick both of them during the Ubuntu installation process(make sure you are connected to the internet before doing so), restricted extras package will be installed automatically and you will be able to play mp3’s and watch flash videos(YouTube videos for example) right after Ubuntu installation is complete.

    * But there is a catch. If you have a slow internet connection(which is very rare these days), ticking the boxes shown in the screenshot above will unnecessarily lengthen the installation process. I for one prefer to do all that after installing Ubuntu. If you are like me, the next two steps are for you.


    2) Update Repositories

    * After you install brand new Ubuntu 11.10, the first thing you need to do is to update repositories and make sure you have the latest updates installed(Like I said before, you need to do this only if you haven’t ticked the boxes shown in the above screenshot).

    *Open Terminal(Ubuntu 11.10 Keyboard Shortcut: Ctrl + Alt + T) and copy-paste the following command into Terminal. 

    sudo apt-get update && sudo apt-get upgrade

    * Done. Ubuntu repositories have been successfully updated.


    3) Install Ubuntu Restricted Extras

    * Install the “ubuntu-restricted-extras” package. This will enable your Ubuntu to play popular file formats like mp3, avi, Flash videos etc. Click Here OR simply copy-paste the command below into Terminal to install the package(You need not do this also if you have ticked the ‘right’ boxes).

    sudo apt-get install ubuntu-restricted-extras

    * Done.


    4) Enable Full DVD Playback(Dual Layer DVD Support)

    * Though installing the restricted extras package will solve most of your problems, you may not be able to play dual layer dvds yet in your Ubuntu.

    * For that, you need to install libdvdcss2 package from medibuntu repositories. Simply do the following in Terminal.

    sudo wget –output-document=/etc/apt/sources.list.d/medibuntu.list http://www.medibuntu.org/sources.list.d/$(lsb_release -cs).list && sudo apt-get –quiet update && sudo apt-get –yes –quiet –allow-unauthenticated install medibuntu-keyring && sudo apt-get –quiet update

    sudo apt-get install libdvdcss2

    * Done.


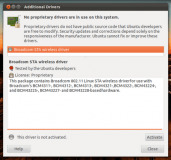
    5) Check for Availability of Proprietary Hardware Drivers

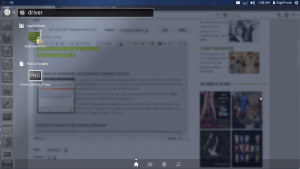
    driver copydrivers ubuntu1110
    * In my case, all the hardware drivers including graphics, sound and wireless drivers were enabled automatically(though, as you can see, I still have a proprietary wireless driver on offer, which I have not activated). But this may not be the case with everyone.

    * If you are among the not-so-lucky, open Unity dash (Ubuntu 11.10 Keyboard Shortcut: Super key) and search for ‘Additional Drivers’ application.

    * Check for additional drivers available and activate the ones you want. In 90% of the cases, this will do the trick. Those who were not able to get their hardware drivers enabled yet will have to do fair amount of digging through ubuntuforums.


    6) Install Compiz Config Settings Manager

    digitfreakccsmCompizConfig Settings Manager 019
    * Compiz desktop effects are available in your Ubuntu by default and if you have any kind of 3D acceleration available(graphics driver ie), you are good to go with Compiz.

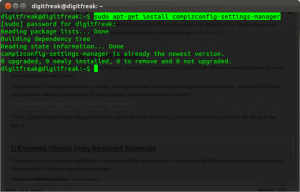
    * Now to tweak Compiz desktop effects in Ubuntu, you need to install “compizconfig-settings-manager” package. Click Here OR simply copy paste the following command into Terminal to install “compizconfig-settings-manager”.

    sudo apt-get install compizconfig-settings-manager

    * Done. Compiz Config Settings Manager(CCSM) is significant as far as Ubuntu 11.10 Oneiric Ocelot is concerned. We will get to that later on.


    7) Essential Ubuntu Unity Keyboard Shortcuts

    * Productivity can be increased significantly in new Ubuntu Unity desktop if you know the essential Unity keyboard and mouse shortcuts. Here are some of the most important among them.

    * Super Key(Windows Key) – Opens dash.

    * Hold Super Key and hit 1, 2, 3 etc – Open an Application from Launcher. When you hold the Super Key, specific numbers will be displayed in order above each application.

    * Alt + F1 – Put keyboard focus on the Launcher, use arrow keys to navigate, Enter key launches the application, Right arrow exposes the quicklists if an application has them.

    * Alt + F2 – Opens dash in special mode to run any commands.

    * Super + A – Opens up applications dash.

    * Super + F – Opens up files and folders dash.

    Super + W – Spread mode, zoom out on all windows in all workspaces.

    * Super + D – Minimize all windows(acts as Show Desktop). Hitting it again restores them.

    * Super + T – Opens trash can.

    * Super + S – Expo mode (for everything), zooms out on all the workspaces and let’s you manage windows.

    * Ctrl + Alt + T – Launch Terminal.

    * Ctrl + Alt + L – Lock Screen.

    * Ctrl + Alt + Left/Right/Up/Down – Move to new workspace.

    * Ctrl + Alt + Shift + Left/Right/Up/Down – Place window to a new workspace.

    * F10 – Open the first menu on top panel, use arrows keys to browse across the menus.


     Mouse Shortcuts/Tricks for Ubuntu Unity

    * Clicking and holding an icon and then dragging it around will allow you to reorder it on the launcher. You can also drag it off to the right of the launcher to move it around. Note that you need to make an explicit movement to the right to move the icon off the launcher before you can move it around.

    * Dragging and Dropping an icon into the trash can will remove it from the Launcher.

    * Moving and holding the cursor on the left side for a few seconds will launch Unity dock.

    * Moving the cursor to top-left corner(near Ubuntu icon) will launch Unity dock as well.

    * Scrolling the mouse wheel while over the Launcher scrolls the icons if you have too many and need to move around quickly.

    * By Scrolling the mouse wheel while over the Sound icon on top panel helps you increase or decrease system volume.

    * Middle click on an application’s launcher icon – Open a new instance of the application in a new window. Very useful at times. In laptops with touchpads, hitting left/right click buttons together is akin to middle click.

    * Maximizing – Dragging a window to the top panel will maximize it.

    * Restore/Unmaximize – Dragging the top panel down OR double clicking on the top panel will do.

    * Tiling – Dragging a Window to the left/right border will auto tile it to that side of the screen. One of the highlights of new Unity experience.


    And Some Useful Window Management Shortcuts(Generic)

    * Alt + F10 – Toggle between Maximize/Unmaximize current window.

    * Alt + F9 – Minimize current window.

    * Alt + Tab – Toggle between currently open windows.

    * Alt + F4 – Closes current window.

    * Alt + F7 – Moves the current window(both keyboard and mouse can be used).


    8) Enable Transparency for Unity Top Panel

    ccsmCompizConfig Settings Manager 021
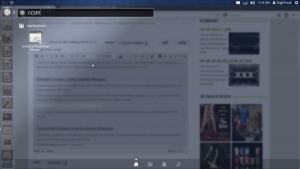
    * Launch CCSM. Hit Super + a and search for CCSM.

    * After launching CCSM, select Ubuntu Unity Plugin from ‘Desktop’ category. Now choose the Experimental tab from above.

    * There you will see the ‘Panel Opacity’ option. Change it to the value you like.


    9) Increase/Decrease the Launcher Icon Size

    CompizConfig Settings Manager 021* Just as before, Launch CCSM(Super + a and search for CCSM) and then browse to Ubuntu Unity Plugin. Choose ‘Experimental’ tab.

    * Adjust the value of ‘Launcher Icon Size’ by simple scrolling. The default value of ‘Launcher Icon Size’ is 48, but I like it around 40 for my laptop.


    10) Change Desktop Size

    * By default, Ubuntu 11.10 Oneiric Ocelot gives you four workspaces to play around. Keyboard shortcut for activating the four workspaces is Super + s. Now, if you want to increase/decrease that number do the following.

    * Launch CCSM yet again, and select General Options from the category ‘General’. Select the tab ‘Desktop Size’ and choose the values you want. Simple as that.


    11) Add your Favourite Places As Quicklist for Home Icon in Unity

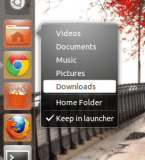
    Unity quicklistsQuicklists are something that I thought would be included as a default feature in Ubuntu 11.10 Oneiric Ocelot(at least some of them). But that didn’t happen. Home Menu quicklist in my opinion, is a must have feature(see screenshot to know how it will look like). Follow the steps to add your favorite places as quicklists.

    * Copy ‘Home Folder’ launcher file to your home directory. For that, you need to open Terminal(Unity Shortcut: Ctrl + Alt + T) and copy-paste the following commands.

    cp /usr/share/applications/nautilus-home.desktop ~/.local/share/applications

    * Open the file in your favorite text editor. I am using Gedit here.

    gedit ~/.local/share/applications/nautilus-home.desktop

    * Now replace the content of the file with the following text.

    [Desktop Entry]

    Name=Home Folder

    Comment=Open your personal folder

    TryExec=nautilus

    Exec=nautilus –no-desktop

    Icon=user-home

    Terminal=false

    StartupNotify=true

    Type=Application

    Categories=GNOME;GTK;Core;

    OnlyShowIn=GNOME;Unity;

    X-GNOME-Bugzilla-Bugzilla=GNOME

    X-GNOME-Bugzilla-Product=nautilus

    X-GNOME-Bugzilla-Component=general

    X-Ubuntu-Gettext-Domain=nautilus

    X-Ayatana-Desktop-Shortcuts=Videos;Documents;Music;Pictures;Downloads

    [Videos Shortcut Group]

    Name=Videos

    Exec=nautilus Videos

    TargetEnvironment=Unity

    [Documents Shortcut Group]

    Name=Documents

    Exec=nautilus Documents

    TargetEnvironment=Unity

    [Music Shortcut Group]

    Name=Music

    Exec=nautilus Music

    TargetEnvironment=Unity

    [Pictures Shortcut Group]

    Name=Pictures

    Exec=nautilus Pictures

    TargetEnvironment=Unity

    [Downloads Shortcut Group]

    Name=Downloads

    Exec=nautilus Downloads

    TargetEnvironment=Unity

    * And restart Unity. Hit Alt + F2 and run the following command to restart Unity.

    unity –replace

    * Done. If that doesn’t work, you might need to log out and log back in to restart Unity.


    12) Enable Uity Grab handles

    CompizConfig Settings Manager 022CompizConfig Settings Manager 023CompizConfig Settings Manager 024unity grab handles
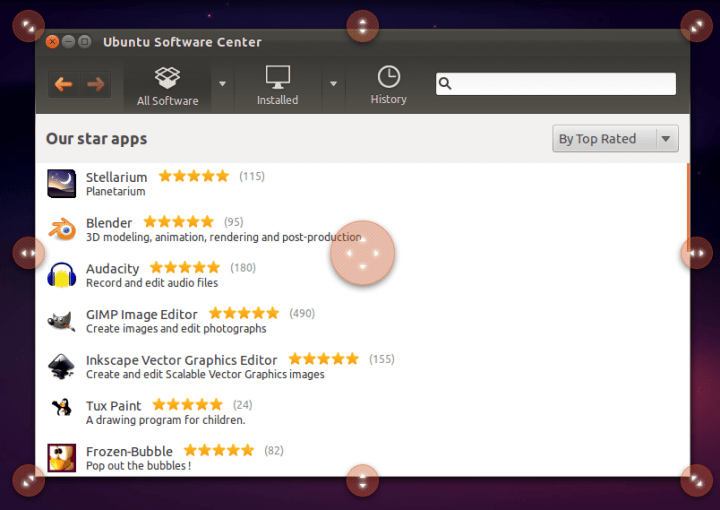
    This is another feature that I thought would be included as a default. Unity grab handles are a easy and eyecandy way of resizing windows, better suited for touch screen devices though.

    * Launch CCSM(just search for CCSM in Unity Dash).

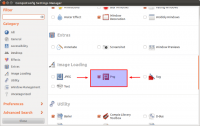
    * Make sure that the category Png(highlighted above) is ticked.

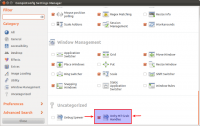
    * In the Uncategorized section at the bottom of CCSM, make sure that Unity MT Grab Handles is ticked as well. Click on Unity MT Grab Handles option now.

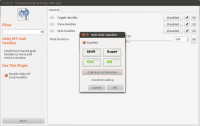
    * You will see that the Toggle Handles option is Disabled by default. Click on the Disabled button and tick the resulting Enabled box.

    * Hit Grab key combination button and select the shortcut you want. As you can see in the screenshot above, Control + Alt + g was my choice. Its up to you.

    * Done. Unity Grab Handles are enabled in Ubuntu 11.10 successfully.


    13) Install sysmonitor App Indicator

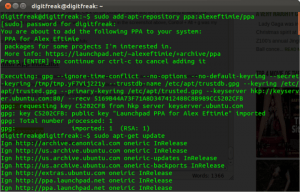
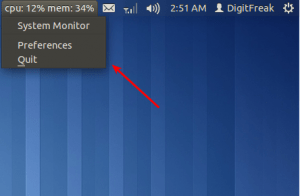
    Unity’s top panel is locked down and it is not easy to add apps to it anymore. App Indicators are an excellent way to extend the functionality of Unity top panel in Ubuntu Oneiric. And Sysmonitor application indicator is one of my favorite.

    digitfreak2Screenshot at 2011-12-15 025139
    * To install Sysmonitor Indicator in Ubuntu 11.10, you need to copy paste the following commands into Terminal.

    sudo add-apt-repository ppa:alexeftimie/ppa

    sudo apt-get update

    sudo apt-get install indicator-sysmonitor

    * Done. Now, simply launch Sysmonitor Indicator from Unity dash.


    14) Install Gnome Shell on Ubuntu

    Screenshot at 2011-12-09 112836
    Installing GNOME Shell in Ubuntu is not “mission impossible” anymore. Ubuntu 11.10 Oneiric Ocelot is GNOME 3.0 based and installing GNOME Shell in Oneiric is just a click away. Instead of one simple GNOME interface, now you have two, each one unique and special in its own way. Here is how you install it. Just search for ‘GNOME Shell’ in Software Center OR do the following in Terminal.

    sudo apt-get install gnome-shell

    Read How to Install Gnome 3 in Ubuntu 11.10, for more details and further configurations.