Author: Swadesh Parasher

  • Top 10 solid rugged cases for your iphone

    Top 10 solid rugged cases for your iphone

    Everyone loves their iPhone, no wonder how careful you are chances are that you gonna make your iPhone weep unknowingly. If you are adventurous person, you might risk your iPhone to be dumped, splashed, shattered, kicked, bumped, dropped or dinged. No wonder people use a highly rugged cases for such situation. They somewhat look ugly and your friends or other people who get to see your iPhone cover will hate it (and most probably you do). but they does their work, what is they are good at. 

    Here is the list of 10, highly rugged military style iPhone cases you might opt for:

    11. Incipio Bombproof

    We like the chunky “grenade” look of the Boomproof, but that’s not all it has going for it.

    As well as raised, covered buttons where the iPhone’s controls are, it comes complete with a clear screen protector.

    This high-density silicone case is also available in red, orange, blue, black, pink and grey.

    Cost starts: $4.00


    22. iSkin Revo 4

    iSkin’s rugged solution has a unique selling point — a detachable, tinted screen “ViSOR” that has a touch-friendly “zone” at the bottom of the screen.

    This lets users answer calls without exposing their handset to risk. When not in use the ViSOR clips to the back of the case.

    Cost: From $25.99


    33. Speck MightyVault

    Boasting triple-layer protection, the MightyVault system has extra silicone at its corners and a hard polycarbonate shell that can be removed.

    For times when you want extra protection, the connector and headphone jack can be sealed off with rubbery covers.

    Cost: $28.99


    44. Case-Mate Tank

    Case-Mate’s “Tank” comprises of a hard polycarbonate impact resistant exterior and a shock-absorbing silicone interior.

    Its tough credentials are enhanced by the retractable screen protector — an easy-slide, polypropylene retractable screen that shields the front of the phone.

    Cost: $38.99


    55. Griffin Technology Survivor

    Griffin’s “Survivor” case is made up of a shatter-resistant polycarbonate frame surrounded by shock-absorbing silicone.The Survivor incorporates a built-in screen protector, a detachable clip and hinged plugs to protect the connector and headphone jack.Offering protection from rain, blown dust and grit, vibration, shock, temperature and humidity, the case is certified to U.S. Department of Defense Standard 810 degrees F.

    Cost: $34.99

    66. LifeProof iPhone Case

    LifeProof’s offering is waterproof, dirtproof, snowproof and shockproof for drops of up to six and a half feet.

    With a sleek design, slimline dimensions and weighing in at under an ounce, it’s a great option for anyone looking for protection without the tough guy looks.

    Cost: $79.99


    77. Cygnett WorkMate Pro

    The WorkMate Pro combines polycarbonate and silicone to offer protection against drops and everyday bumps and scrapes.

    It comes complete with a screen protector, a two year manufacturer’s warranty, and looks that will help you spot your iPhone a mile off.

    Cost: $19.99


    88. Seidio CONVERT

    The Siedio CONVERT system boasts two cases in one. There’s a slimline case designed for everyday protection and a heavy-duty case which Siedio claims meets “the demands of the outdoors and rugged professions.”

    Additionally, the locking CONVERT holster will secure your iPhone to a utility belt for times when you need to go hands-free.

    Cost: From $33.99

    99. IvySkin Quattro4 Wrangler

    The Quattro4 Wrangler gets a real glass, anti-glare “Touch-Thru” screen, while the case is made from “ultra-high strength” polycarbonate, aluminum and TPU.

    Other features of note include a special six-point lining that IvySkin claims will act as airbags for the iPhone in case of a drop and pressure-sensing power and home buttons.

    Cost: From $49.99


    1010. Kraken A.M.S. iPhone 4S

    With dust filters and a built-in screen protector, the Kraken will shield your phone from harm.

    Another two-in-one solution, the tough outer casing can be removed leaving a silicone cover for more lightweight protection.

    The Kracken’s big selling point is the interchangeable kickstand which can be removed to fit various accessories such as a car or tripod mount or universal clip.

    Cost: $44.95

  • Want to download files using IDM in Ubuntu, huh?

    Want to download files using IDM in Ubuntu, huh?

    A Few nights ago, I was searching for porn on internet (For which I am very popular!) and I found a great kickass video which I needed to download. Fortunately, I got the direct link for that video, but the file size was too big and I knew that if any interruptions happened then I will not be able to resume my download again.

    Then my search for a resumable GUI Download manager started. At the beginning when i shifted to Ubuntu, like all the other desperate windows users I also tried to install IDM using wine but failed. Very little did I know that the real solution was hidden within the same software. It was the start of my mission and That night I was searching for this kind of software everywhere. In Ubuntu software center, I even found an app named ‘kget’ with the same facilities like resumable download and all that usual shit but it was too big for my Urgent need. Finally, I started feeling hopeless that I would not be able to download this porn, and would forever miss this one.

    I don’t know how but I felt the urge to crawl online for any other methods or ways to download the files just the way IDM does. And There it was waiting for me in google’s Advanced search!

    So after all this foreplay what I found is that you can get the same old, same old app named “The great great IDM” working in Linux if and only if you have got wine installed and a setup file of “IDM Version 5.05“.


    Don’t worry if you don’t have it then I will get you there. I know that you are getting more desperate as i write each extra word. Without further ado, Click here if you want to download IDM v5.05(of course you do!). Don’t worry i am not kidding and also the file size is only 2 mb!

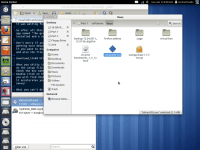
    Download_link# http://download.oldapps.com/IDM/idman505.exe

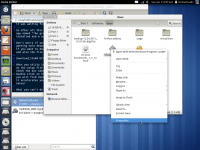
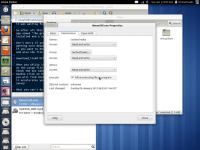
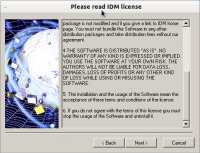
    After you shitty internet connection is done with this download, then right-click on the setup file and go in the properties menu. There under permissions tab, check the box named ‘allow executing file as a program‘.

    123

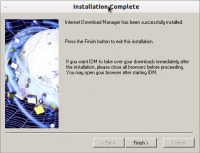
    And you are good to go.
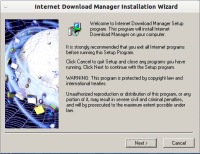
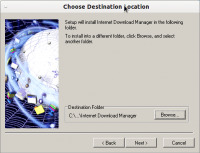
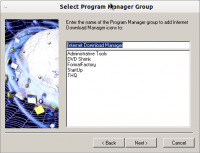
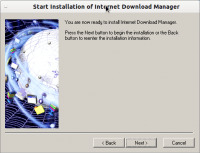
    Double click on the IDM setup and go through the normal installation process and you will find that it’s working just the same way. On top of that I found out that it accelerates your download speed up to twice as it did in my case! Isn’t that savvy?

    abc
    def

    If you don’t know where those files are being installed, don’t worry. There are here. Make a copy of the link for that folder if you wish on your desktop. Go to your home directory and there press ‘ctrl+H’. That’s how you show your hidden files in Ubuntu. Look for a directory named ‘.wine’. Inside that directory  you will see two folders. Open the folder named ‘drive_c’. You are now in your fake windows system drive and you see the familiar folders like windows and program files. Inside the program files you can find the installed files of any software that you have installed through wine.

    What you can’t do in this Forced installation?
    Don’t be afraid!, its not like i am gonna write that you won’t be able to download anything at all, just to see the IDM window. lol!. Now You don’t have the download panel property in this version. So you will need to have a direct download link to download any file. Also Even if you try to Force any download using the ‘force download keys‘ option, its all gonna be a waste.

    You will  also need to register this version of IDM if you want to use it longer than one month.

    Ok! Fine. I am going to help you here also, but this is the last time. If you have eyes then you must have noticed something glowing in he text below. It’s not my effing phone number! GOD! you guys are like kids. Thats the registration key for IDM. In the ‘help’ menu of you IDM select the ‘Registration’ option. The registration dialog opens and there insert whatever you wish in the names and email ID, along with the key in the respective boxes(what else did you think were we going to do? huh?). And when you are done you will see that its registered!

    Key# HFLUV-FRUKA-2R7U7-GLHQ1

    hurrah!

    I believe, that after this tutorial(ass whooping) all you of you people are happy and enjoying all the porn, shit! sorry . I mean you are all downloading all that you wish without any interruptions, and time limits. (just the way i enjoyed my night)!


    In the end, let’s take some credits. Let’s see..

    1. You had to download only 2MBs instead of 60MBs! that kget needed you to download.

    2. You enjoy the whole IDM features and registration just for nothing more than your one visit to Digitfreak.

    3. You got introduced to the coolest person alive for free!

    4. And add all the things that you want to thank me for in the list that has no end whatsoever..lol

    “WHY FEAR, WHEN ‘the dude‘ IS HERE” – Timamirrockdude

    [Note: Don’t ask me for that porn video link now! Btw it was really nice and HD sized 232MB only!. Ain’t that great!]

  • How to install/Update Firefox on Linux Mint, Ubuntu… or any other debian based Linux distribution

    How to install/Update Firefox on Linux Mint, Ubuntu… or any other debian based Linux distribution

    Basically Firefox on Ubuntu provides 4 modes of update. Daily Channels (nightly Builds), Firefox Beta, Firefox for future (named aurora), and then comes the stable release.

    all you need to know is the basic terminal commnad to make everything simpler. Here you go.

    1. Ubuntu: ubuntu-mozilla-daily ppa! (nightly Build)

    Many howtos on this subject will tell you to install Firefox pre-versions through Mozilla’s ppa ubuntu-mozilla-daily.

    Using this ppa will not only install the latest Firefox 10 nightly build, used to be called “minefield” – updated daily! It will also update your current Firefox and Thunderbird to test versions.

    These testing versions are not meant to be stable. Avoid this ppa unless you know exactly what you’re doing!
    If you want to install firefox on production machine, scroll down to #4

    open terminal and run the following commands:

    sudo apt-add-repository ppa:ubuntu-mozilla-daily/ppa
    sudo apt-get update && sudo apt-get upgrade
    sudo apt-get install firefox

    2. The Firefox Beta ppa: mozillateam/firefox-next

    The firefox-next ppa will replace your current Firefox installation with the current available version in Mozillas Beta channel. Simply run these two commands in a terminal:

    sudo apt-add-repository ppa:mozillateam/firefox-next
    sudo apt-get update && sudo apt-get upgrade
    sudo apt-get install firefox

    3. Firefox For the Future (Aurora)

    You may also have a look at the Firefox Aurora ppa.

    open terminal and run the following commands:

    sudo apt-add-repository ppa:ubuntu-mozilla-daily/firefox-aurora
    sudo apt-get update && sudo apt-get upgrade
    sudo apt-get install firefox 

    Note: you can use only one of these three channels (Aurora, Beta, and Daily) at the same time! rememember that Aurora is not stable and is for developers only. It is the test version and a place where Mozilla team tests their new scripts and approach. So, until and unless you are a dev, we won’t recommend you to install Aurora for any purpose.

    4. Firefox Stable Releases

    Firefox Stable is comes bundled in most of the Linux distros. You won’t need to install or upgrade it manually because linux team updates it automatically each time you run the system update. Since Ubuntu 11.04 “Natty Narwhal”, Ubuntu will update automatically to the newest stable Firefox version when it is released. (it may take a few days more, though) This is also valid for Ubuntu 11.10 “Oneiric Ocelot” and upcoming releases.

    However, if due to some reason you don’t have it installed already. you can follow the simple steps below.

    open terminal and run the following commands:

    sudo apt-add-repository ppa:mozillateam/firefox-stable
    sudo apt-get update && sudo apt-get upgrade
    sudo apt-get install firefox

    That’s all you are ready to have Latest version of Mozilla Firefox. You just need to choose which channel you want to go with. We would prefer stable or beta version. nightly builds and aurora are unstable most of the time and they can really make you slam your head on the wall!

    *Don’t subscribe/install two ppa channels at the same time, it would lead to a conflict.

    *To remove the ppa, use this terminal command -> sudo apt-add-repository remove {channel name you want to remove}

  • Enable minimize, maximize button, Gnome 3 on Ubuntu 11.10

    Enable minimize, maximize button, Gnome 3 on Ubuntu 11.10

    After having an native option to upgrade the unity with New Gnome 3 with one click, thousands of Ubuntu users did the same. There are many who doesn’t like it and on the other side there are thousands who love the new Gnome interface. There are few glitches user think Gnome shouldn’t have. But, Eventually they figure it out that it has been hidden intentionally. One of it is missing Minimize and Maximize button.

    Yes, you heard me right. The new Gnome 3 for Linux doesn’t incorporate the Minimize and Maximize button by default. You have to enable them from the advanced settings. Well, the question is how you can find the advanced settings option in your Ubuntu?

    Actually, we are talking about the “Ubuntu Tweak” Repository here. You can download Ubuntu Tweak from software center. or just click here.


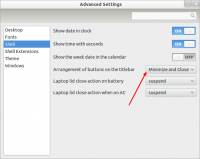
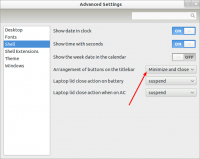
    Advanced Settings 029Instructions :

    1. search for “advanced Settings” in your Computer where you have installed Gnome.

    2. Click on “Shell” from the list on the left-hand side of the window.

    3. You will find an option “Arrangement of buttons on Titlebar” With the dropdown menu.

    4. choose the option suitable for you.

    5. Close “advanced Settings” Window.

    6. Done.

    Requirement:

    Ubuntu Tweak Tool

  • Things you can do after installing Ubuntu 11.10

    Things you can do after installing Ubuntu 11.10

    Ubuntu 11.10 is quite a large over-ripped (and wrapped) version of it’s predecessor. The new Ubuntu 11.10 Oneiric ocelot was released on Oct 13th 2011. I have been using Ubuntu 11.10 since it’s release (and even before, when alha 1 was released). Ever since the arrival of Unity, many new and old Ubuntu users are looking for ways to improve the functionality aspect of Ubuntu and customize the Unity environment to their respective needs. Here are the few tips and tricks you can opt for, for your new Ubuntu 11.10 :


    1) Installing Restricted extras during Installation

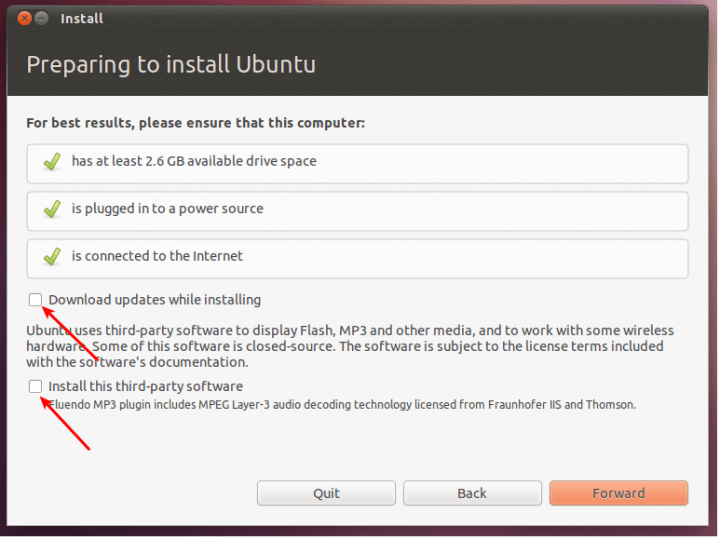
    * Starting from Ubuntu 11.04 release, you can install restricted codecs package(which include Adobe Flash, MP3 codecs and such) during installation of Ubuntu OS itself.

    Screenshot* Notice the arrows pointing to the boxes in the screenshot above. If you tick both of them during the Ubuntu installation process(make sure you are connected to the internet before doing so), restricted extras package will be installed automatically and you will be able to play mp3’s and watch flash videos(YouTube videos for example) right after Ubuntu installation is complete.

    * But there is a catch. If you have a slow internet connection(which is very rare these days), ticking the boxes shown in the screenshot above will unnecessarily lengthen the installation process. I for one prefer to do all that after installing Ubuntu. If you are like me, the next two steps are for you.


    2) Update Repositories

    * After you install brand new Ubuntu 11.10, the first thing you need to do is to update repositories and make sure you have the latest updates installed(Like I said before, you need to do this only if you haven’t ticked the boxes shown in the above screenshot).

    *Open Terminal(Ubuntu 11.10 Keyboard Shortcut: Ctrl + Alt + T) and copy-paste the following command into Terminal. 

    sudo apt-get update && sudo apt-get upgrade

    * Done. Ubuntu repositories have been successfully updated.


    3) Install Ubuntu Restricted Extras

    * Install the “ubuntu-restricted-extras” package. This will enable your Ubuntu to play popular file formats like mp3, avi, Flash videos etc. Click Here OR simply copy-paste the command below into Terminal to install the package(You need not do this also if you have ticked the ‘right’ boxes).

    sudo apt-get install ubuntu-restricted-extras

    * Done.


    4) Enable Full DVD Playback(Dual Layer DVD Support)

    * Though installing the restricted extras package will solve most of your problems, you may not be able to play dual layer dvds yet in your Ubuntu.

    * For that, you need to install libdvdcss2 package from medibuntu repositories. Simply do the following in Terminal.

    sudo wget –output-document=/etc/apt/sources.list.d/medibuntu.list http://www.medibuntu.org/sources.list.d/$(lsb_release -cs).list && sudo apt-get –quiet update && sudo apt-get –yes –quiet –allow-unauthenticated install medibuntu-keyring && sudo apt-get –quiet update

    sudo apt-get install libdvdcss2

    * Done.


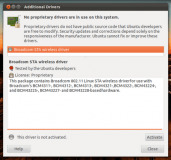
    5) Check for Availability of Proprietary Hardware Drivers

    driver copydrivers ubuntu1110
    * In my case, all the hardware drivers including graphics, sound and wireless drivers were enabled automatically(though, as you can see, I still have a proprietary wireless driver on offer, which I have not activated). But this may not be the case with everyone.

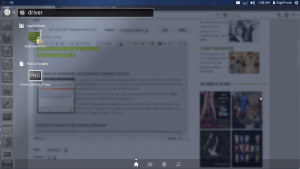
    * If you are among the not-so-lucky, open Unity dash (Ubuntu 11.10 Keyboard Shortcut: Super key) and search for ‘Additional Drivers’ application.

    * Check for additional drivers available and activate the ones you want. In 90% of the cases, this will do the trick. Those who were not able to get their hardware drivers enabled yet will have to do fair amount of digging through ubuntuforums.


    6) Install Compiz Config Settings Manager

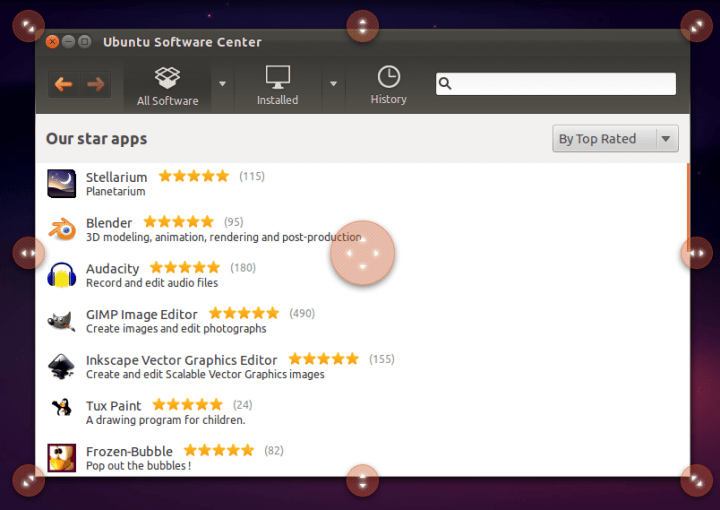
    digitfreakccsmCompizConfig Settings Manager 019
    * Compiz desktop effects are available in your Ubuntu by default and if you have any kind of 3D acceleration available(graphics driver ie), you are good to go with Compiz.

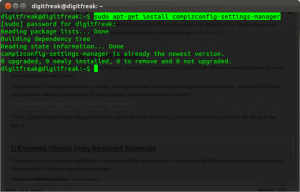
    * Now to tweak Compiz desktop effects in Ubuntu, you need to install “compizconfig-settings-manager” package. Click Here OR simply copy paste the following command into Terminal to install “compizconfig-settings-manager”.

    sudo apt-get install compizconfig-settings-manager

    * Done. Compiz Config Settings Manager(CCSM) is significant as far as Ubuntu 11.10 Oneiric Ocelot is concerned. We will get to that later on.


    7) Essential Ubuntu Unity Keyboard Shortcuts

    * Productivity can be increased significantly in new Ubuntu Unity desktop if you know the essential Unity keyboard and mouse shortcuts. Here are some of the most important among them.

    * Super Key(Windows Key) – Opens dash.

    * Hold Super Key and hit 1, 2, 3 etc – Open an Application from Launcher. When you hold the Super Key, specific numbers will be displayed in order above each application.

    * Alt + F1 – Put keyboard focus on the Launcher, use arrow keys to navigate, Enter key launches the application, Right arrow exposes the quicklists if an application has them.

    * Alt + F2 – Opens dash in special mode to run any commands.

    * Super + A – Opens up applications dash.

    * Super + F – Opens up files and folders dash.

    Super + W – Spread mode, zoom out on all windows in all workspaces.

    * Super + D – Minimize all windows(acts as Show Desktop). Hitting it again restores them.

    * Super + T – Opens trash can.

    * Super + S – Expo mode (for everything), zooms out on all the workspaces and let’s you manage windows.

    * Ctrl + Alt + T – Launch Terminal.

    * Ctrl + Alt + L – Lock Screen.

    * Ctrl + Alt + Left/Right/Up/Down – Move to new workspace.

    * Ctrl + Alt + Shift + Left/Right/Up/Down – Place window to a new workspace.

    * F10 – Open the first menu on top panel, use arrows keys to browse across the menus.


     Mouse Shortcuts/Tricks for Ubuntu Unity

    * Clicking and holding an icon and then dragging it around will allow you to reorder it on the launcher. You can also drag it off to the right of the launcher to move it around. Note that you need to make an explicit movement to the right to move the icon off the launcher before you can move it around.

    * Dragging and Dropping an icon into the trash can will remove it from the Launcher.

    * Moving and holding the cursor on the left side for a few seconds will launch Unity dock.

    * Moving the cursor to top-left corner(near Ubuntu icon) will launch Unity dock as well.

    * Scrolling the mouse wheel while over the Launcher scrolls the icons if you have too many and need to move around quickly.

    * By Scrolling the mouse wheel while over the Sound icon on top panel helps you increase or decrease system volume.

    * Middle click on an application’s launcher icon – Open a new instance of the application in a new window. Very useful at times. In laptops with touchpads, hitting left/right click buttons together is akin to middle click.

    * Maximizing – Dragging a window to the top panel will maximize it.

    * Restore/Unmaximize – Dragging the top panel down OR double clicking on the top panel will do.

    * Tiling – Dragging a Window to the left/right border will auto tile it to that side of the screen. One of the highlights of new Unity experience.


    And Some Useful Window Management Shortcuts(Generic)

    * Alt + F10 – Toggle between Maximize/Unmaximize current window.

    * Alt + F9 – Minimize current window.

    * Alt + Tab – Toggle between currently open windows.

    * Alt + F4 – Closes current window.

    * Alt + F7 – Moves the current window(both keyboard and mouse can be used).


    8) Enable Transparency for Unity Top Panel

    ccsmCompizConfig Settings Manager 021
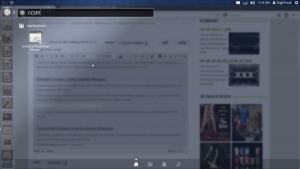
    * Launch CCSM. Hit Super + a and search for CCSM.

    * After launching CCSM, select Ubuntu Unity Plugin from ‘Desktop’ category. Now choose the Experimental tab from above.

    * There you will see the ‘Panel Opacity’ option. Change it to the value you like.


    9) Increase/Decrease the Launcher Icon Size

    CompizConfig Settings Manager 021* Just as before, Launch CCSM(Super + a and search for CCSM) and then browse to Ubuntu Unity Plugin. Choose ‘Experimental’ tab.

    * Adjust the value of ‘Launcher Icon Size’ by simple scrolling. The default value of ‘Launcher Icon Size’ is 48, but I like it around 40 for my laptop.


    10) Change Desktop Size

    * By default, Ubuntu 11.10 Oneiric Ocelot gives you four workspaces to play around. Keyboard shortcut for activating the four workspaces is Super + s. Now, if you want to increase/decrease that number do the following.

    * Launch CCSM yet again, and select General Options from the category ‘General’. Select the tab ‘Desktop Size’ and choose the values you want. Simple as that.


    11) Add your Favourite Places As Quicklist for Home Icon in Unity

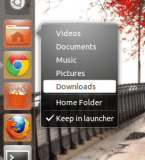
    Unity quicklistsQuicklists are something that I thought would be included as a default feature in Ubuntu 11.10 Oneiric Ocelot(at least some of them). But that didn’t happen. Home Menu quicklist in my opinion, is a must have feature(see screenshot to know how it will look like). Follow the steps to add your favorite places as quicklists.

    * Copy ‘Home Folder’ launcher file to your home directory. For that, you need to open Terminal(Unity Shortcut: Ctrl + Alt + T) and copy-paste the following commands.

    cp /usr/share/applications/nautilus-home.desktop ~/.local/share/applications

    * Open the file in your favorite text editor. I am using Gedit here.

    gedit ~/.local/share/applications/nautilus-home.desktop

    * Now replace the content of the file with the following text.

    [Desktop Entry]

    Name=Home Folder

    Comment=Open your personal folder

    TryExec=nautilus

    Exec=nautilus –no-desktop

    Icon=user-home

    Terminal=false

    StartupNotify=true

    Type=Application

    Categories=GNOME;GTK;Core;

    OnlyShowIn=GNOME;Unity;

    X-GNOME-Bugzilla-Bugzilla=GNOME

    X-GNOME-Bugzilla-Product=nautilus

    X-GNOME-Bugzilla-Component=general

    X-Ubuntu-Gettext-Domain=nautilus

    X-Ayatana-Desktop-Shortcuts=Videos;Documents;Music;Pictures;Downloads

    [Videos Shortcut Group]

    Name=Videos

    Exec=nautilus Videos

    TargetEnvironment=Unity

    [Documents Shortcut Group]

    Name=Documents

    Exec=nautilus Documents

    TargetEnvironment=Unity

    [Music Shortcut Group]

    Name=Music

    Exec=nautilus Music

    TargetEnvironment=Unity

    [Pictures Shortcut Group]

    Name=Pictures

    Exec=nautilus Pictures

    TargetEnvironment=Unity

    [Downloads Shortcut Group]

    Name=Downloads

    Exec=nautilus Downloads

    TargetEnvironment=Unity

    * And restart Unity. Hit Alt + F2 and run the following command to restart Unity.

    unity –replace

    * Done. If that doesn’t work, you might need to log out and log back in to restart Unity.


    12) Enable Uity Grab handles

    CompizConfig Settings Manager 022CompizConfig Settings Manager 023CompizConfig Settings Manager 024unity grab handles
    This is another feature that I thought would be included as a default. Unity grab handles are a easy and eyecandy way of resizing windows, better suited for touch screen devices though.

    * Launch CCSM(just search for CCSM in Unity Dash).

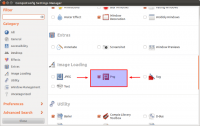
    * Make sure that the category Png(highlighted above) is ticked.

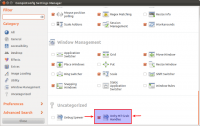
    * In the Uncategorized section at the bottom of CCSM, make sure that Unity MT Grab Handles is ticked as well. Click on Unity MT Grab Handles option now.

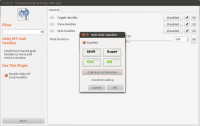
    * You will see that the Toggle Handles option is Disabled by default. Click on the Disabled button and tick the resulting Enabled box.

    * Hit Grab key combination button and select the shortcut you want. As you can see in the screenshot above, Control + Alt + g was my choice. Its up to you.

    * Done. Unity Grab Handles are enabled in Ubuntu 11.10 successfully.


    13) Install sysmonitor App Indicator

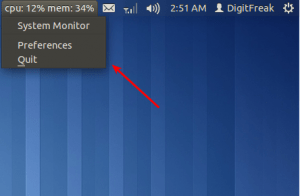
    Unity’s top panel is locked down and it is not easy to add apps to it anymore. App Indicators are an excellent way to extend the functionality of Unity top panel in Ubuntu Oneiric. And Sysmonitor application indicator is one of my favorite.

    digitfreak2Screenshot at 2011-12-15 025139
    * To install Sysmonitor Indicator in Ubuntu 11.10, you need to copy paste the following commands into Terminal.

    sudo add-apt-repository ppa:alexeftimie/ppa

    sudo apt-get update

    sudo apt-get install indicator-sysmonitor

    * Done. Now, simply launch Sysmonitor Indicator from Unity dash.


    14) Install Gnome Shell on Ubuntu

    Screenshot at 2011-12-09 112836
    Installing GNOME Shell in Ubuntu is not “mission impossible” anymore. Ubuntu 11.10 Oneiric Ocelot is GNOME 3.0 based and installing GNOME Shell in Oneiric is just a click away. Instead of one simple GNOME interface, now you have two, each one unique and special in its own way. Here is how you install it. Just search for ‘GNOME Shell’ in Software Center OR do the following in Terminal.

    sudo apt-get install gnome-shell

    Read How to Install Gnome 3 in Ubuntu 11.10, for more details and further configurations.

  • Best Free Siri Alternatives for Android

    Best Free Siri Alternatives for Android

    I own an android device and was thinking if there is a way we can implement the same feature for android devices. But, soon i figured out that there are already some app which allows you to have the similar feature to get same experience for Your Android devices. Here is the quick collection of top free android application (Similar to SIRI).

    vlingo virtual assistance

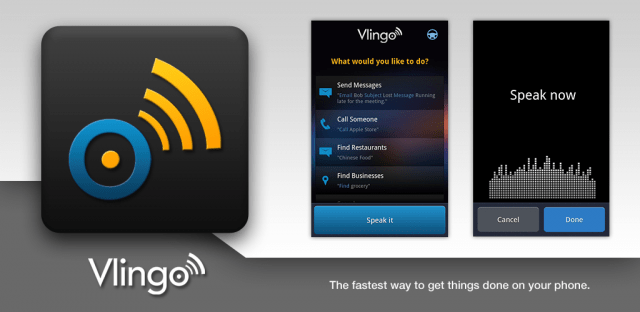
    vlingo androidVlingo Virtual Assistant is perhaps one of the best voice-powered Virtual Assistant on Android. I was pleasantly surprised with the quality of this app, both look-wise and the way it worked. From sending texts and emails to updating your Facebook/Twitter status to checking in with Foursquare, Vlingo does almost everything it is asked to effortlessly.

    Install Vlingo Virtual Assistant from Android Market


    Speaktoit-Assistant

    speaktoit siri alternativeSpeaktoit Assistant app is yet another Siri alternative for Android that just works. With the image, name and everything, Speaktoit Assistant gives you an impression of something that is real. You can ask Jane anything under the sun and you get answers right away. Speaktoit Assistant answer questions, find information, launch apps and connect you with various web services, such as Google, Facebook, Twitter, Foursquare, and many others.
    Install Speaktoit Assistant from Android Market


    skyvi

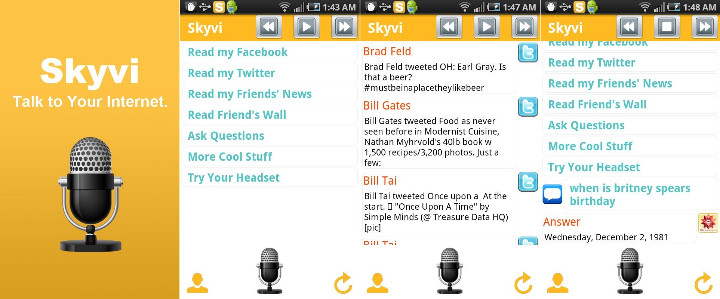
    skyvi siri androidSkyvi is perhaps the application that I spend most time with among other Siri alternatives. All these voice assistant are not perfect. Mistakes often happen like you see in my screenshot above. But you will have a lot of fun for sure.
    Install Skyvi – Siri for Android app from Android Market


    Iris

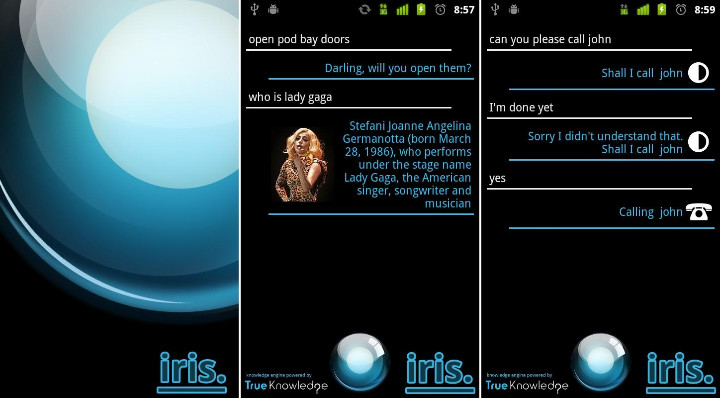
    iris android copyIris is siri in reverse, yet another attempt to replicate or better the voice assistant application for iPhone called Siri. Does everything what you expect it to like making calls, searching the web, texting and so on. Iris even boasts of Android 4.0 Ice Cream Sandwich inspired UI.

    Install Iris – Siri Alternative from Android Market


    Well, i think now you won’t consider switching from android to Apple products for sometime. 😉