If you rely on traditional download managers to achieve the scheduling tasks, you might be out of luck. There are many download managers available on the internet, but “Internet Download Manager” is something that we freaks use for download purpose at regular basis. It is not only capable of scheduling the downloads, but you can also maintain the order in which you want the downloads to be initiated.
So, How you are going to schedule your files on IDM? Don’t worry we are here to help.
[Download Latest version of Internet Download Manager]
Instructions:
 1. Adding Files to the Queue
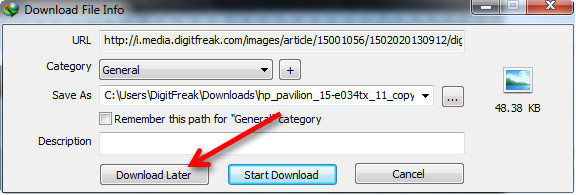
When you click on any link to download files, IDM automatically detects the file type and offers the confirmation window to select from various options. You can change category, provide download destination to save your file along with three actions — “Download Later”, “start Download” and “Cancel” along with details about the file size which appears on the right side of the confirmation window.
If you want to schedule your file to be downloaded later, Just click on “Download Later” button. Upon clicking, it will offer you to choose from the pre-defined scheduling queue.
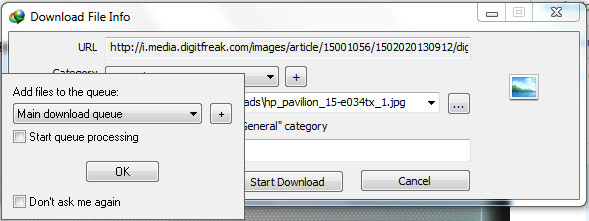 By default “Main download queue” will be selected, and you can start processing the queue right away if you check the “start queue processing” right before clicking on “OK” button. You can also check “Don’t ask me again” to remember your preferred setting.
We just want to add our file to the list of queue. So, just click on “OK”.
2. Tweaking Settings
Go to internet download manager and double click on “Main Download Queue” at the bottom left corner of the window. You’ll be greeted with the default scheduling settings.
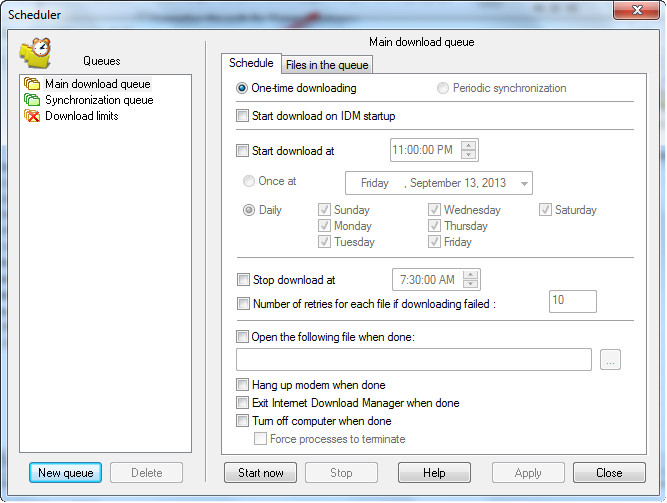 There are two types of scheduling options – “One time download” and “periodic Synchronization.” — As the name suggests “One Time Download,” processes download queue and deletes files from download queue when their download is complete and “periodic synchronization,” IDM checks if the files in the queue have been changed on the server, and if changed, it will download new files and replace old on new ones. All files will stay in the queue after synchronization.
Then comes the real powerful tools and options. The IDM offers a wide flexibility, that can dynamically schedule your file for any practical requirements. You can specify the start and stop time/date/periodicity, Number of retries for each file if downloading failed, open any specific file when download is completed, disconnect internet, exit download manager and turn off your computer automatically.
The powerful tools offered by IDM are very useful for maintaining the download queue and your scheduling needs.
3. Scheduling and downloading Files
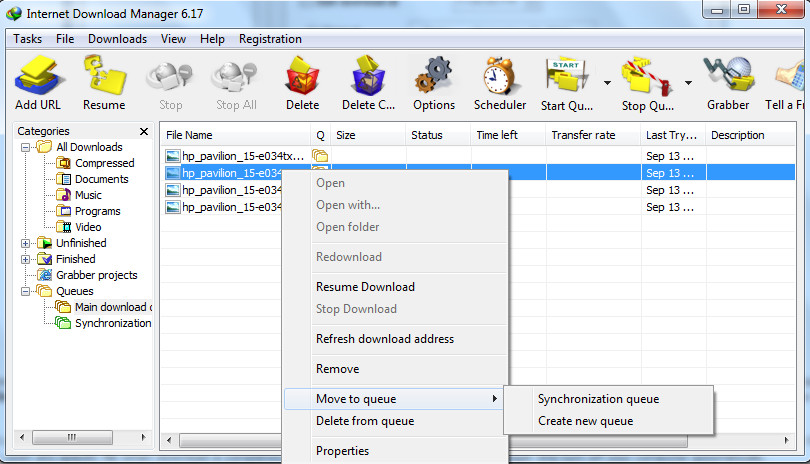
Adding Files to the download queue is very easy. You can go with the option mentioned in step 1 above or you can manually add the files to the download queue. Right click on the file > Hover to “Move to queue > select the queue you want to move the files to.
 To manage the queue and files, click on “Files in the queue” tab. You can change the order of downloads for one or several selected files by using arrow buttons or by using drag & drop. You can also delete download tasks from the queue with Delete button.
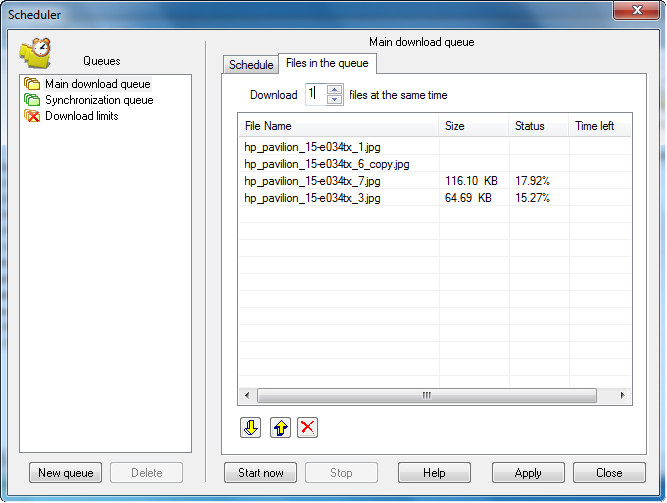

After starting a queue processing IDM starts downloading one file or several files at the same time from the queue. You can set the number of downloaded files at the same time for each queue individually in the corresponding list box.
Leave a Reply