
When you move to WordPress from any hosted blog solution (such as Blogger, Tumblr, Squarespace etc.), you might feel overwhelmed with all the features and flexibility that WordPress self-hosted CMS (Content Management System) has to offer. Once you have decided to make a move, the first step is to figure out how to successfully install WordPress on a web server. It is not a rocket science and anyone can learn how to start a blog with a little bit of knowledge.
Although, things start to get a little trickier after the initial step. Once you’ve set up your new shining WordPress website, you must learn how to migrate your contents from old platform. If you have only a few pages, you can easily migrate all of them manually. However, you have to install and use a plugin if there are a considerable amount of articles.
There are millions of WordPress plugins to choose from. A right plugin can make things much convenient. One can easily move all the posts and images, set up proper url structure, redirect old url, manage SEO (Search Engine Optimization), optimize images and much more.
Every new blogger moving to WordPress platform must know how to install WordPress plugin. There are three different ways to install WordPress plugin which you can learn easily:
- Search and Install WordPress plugin from dashboard
- Upload and Install WordPress plugin from local directory on your computer
- Upload WordPress Plugin directly to the server using FTP
1. Search and Install WordPress Plugin from dashboard
Searching for the plugin from the dashboard is the easiest way to install WordPress plugin. It offers a huge searchable official online WordPress plugin directory.
You can do a quick search if you know the name of the plugin.
Simply go to WordPress Dashboard > Plugins > Add New. Then Search the plugin you want to install.
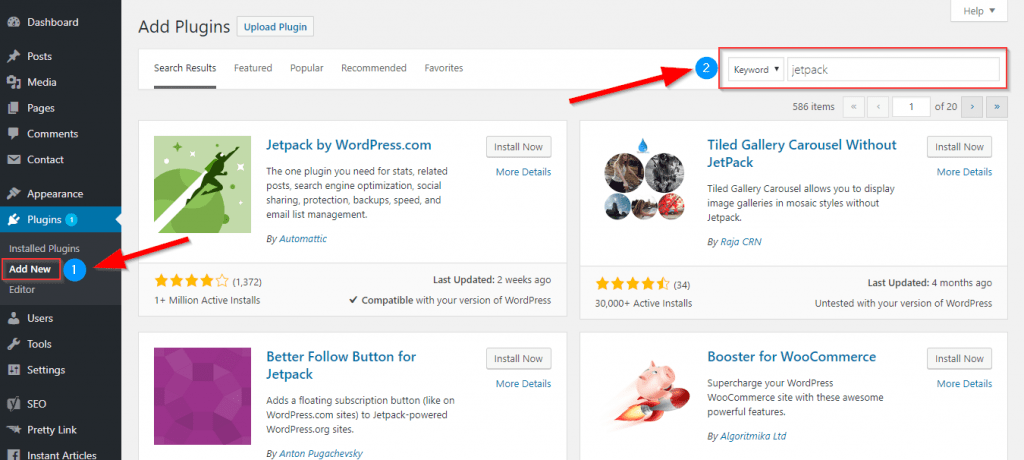
The search result presented will list matching plugins. Furthermore, Clicking on “More Details” will display a comprehensive information about the plugin. The plugin should be compatible with the current version of WordPress.
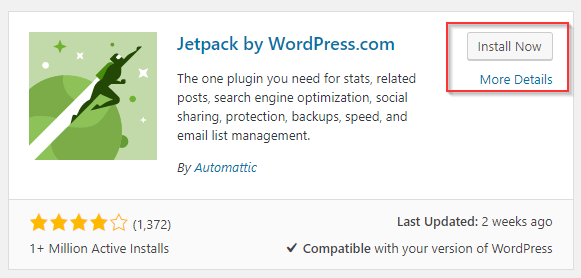 To proceed with the installation, click on “Install Now” followed by “Activate” button that appears next.
The next step should involve going to the settings page of the plugin. Users must configure the settings according to their need. Most new WordPress users simply install the plugin and forget to configure the settings. This is the common mistake among the those who recently migrated to WordPress.
Always remember to configure settings of the installed plugin.
2. Upload and Install WordPress plugin from local directory on your computer
This method is often used when you purchase a licensed premium plugin from third party websites. The developer may have a separate version of the plugin, distinguished from its free variant. Furthermore, Official WordPress Plugin directory also provides installation file in a compressed .zip format.
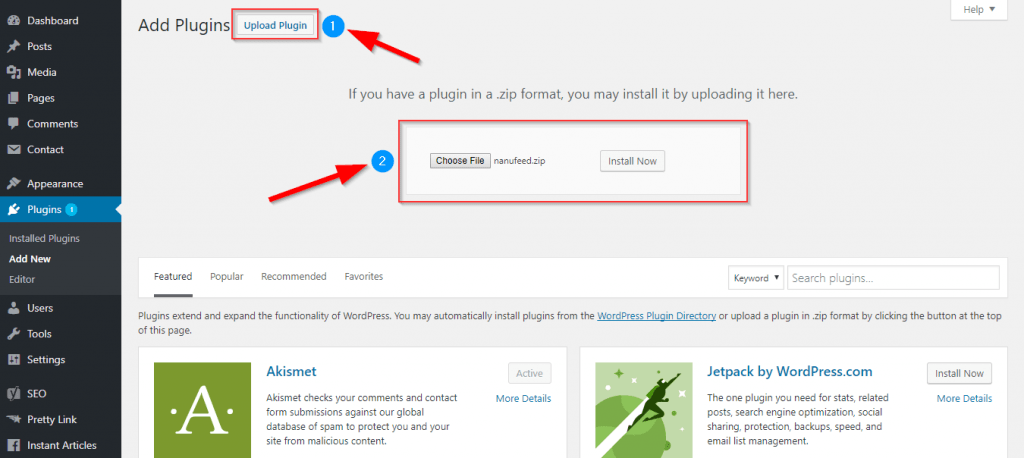 WordPress Users should know how to install plugins using these installation files. In order to proceed with the installation, go to Dashboard > Plugins > Add New and then click on Upload Plugins. Now, we have to upload the .zip file to our website.
Click on “Choose File” and select the installation file from your computer. To upload and install the plugin on the website, click on “Install Now” button. Finally, press “Activate Plugin” to enable it on the website.
3. Upload WordPress Plugin directly to the server using FTP
This is the least recommended method to install a WordPress plugin on the website. In my opinion, most people should use the dashboard to search or upload plugin. FTP method is an additional hassle which should be avoided unless it is a necessity.
Although I was only required to use FTP a handful of times, it proved to be a lifesaver. It is something that WordPress users should master. This method can be really useful when a plugin behaves in an unwanted manner.
First and foremost, you should know that there must be an installation file handy. The zip file has to be decompressed or unzipped before it is ready to be used for FTP transfer. You can use free tools to unzip these files. Additionally, FTP credentials will also be required. You should ask for such information from your hosting provider.
Additionally, FTP credentials will also be required. You should ask for such information from your hosting provider. Furthermore, you should download an FTP client such as Filezilla or Cyberduck.
- Installation file in a zip format (Downloaded from WordPress.org official website or 3rd party websites)
- Tool to unzip/extract files on your computer (Such as Unzip, 7zip or WinRar)
- FTP Credentials (Used to login to your server)
- FTP Client (User interface to transfer files to your server via FTP, viz. Filezilla or Cyberduck)
Read: [How To] Connect to a FTP server and transfer files to your computer
Leave a Reply