The Windows RT users can have the best video player on their and benefit from their throw anything and play it all, reputation of the software, while still being soft on the resource usage.
Earlier the open-source media player raised $78,136 on Kickstarter, to help them fund the development of the software for Windows 8 (x86 and x64 bit) users . The app will play back a range of video and audio formats including MKV, Ogg, MOV, FLAC and MPC, in addition to all of the codecs supported in the regular desktop app, including MPEG-1, H.265, WMV3 and VC-1.
Here are some of the features listed on the kickstarter page:
This application:
works on Windows 8.0 and 8.1: too many people are still on 8.0, so we had to use that. This decreases the stability of the application, though…
is compiled for Intel x86 CPUs: Windows RT version will follow as soon as we are able to compile it. ARM version will also apply to Windows Phone.
plays all video and audio formats of VLC, including MKV, Ogg and Mov files or FLAC and MPC;
supports the same codecs as the VLC application for desktop, from MPEG-1 to H.265, through WMV3 and VC-1;
supports multiple-audio tracks selection;
supports embedded subtitles;
supports Background Audio playback;
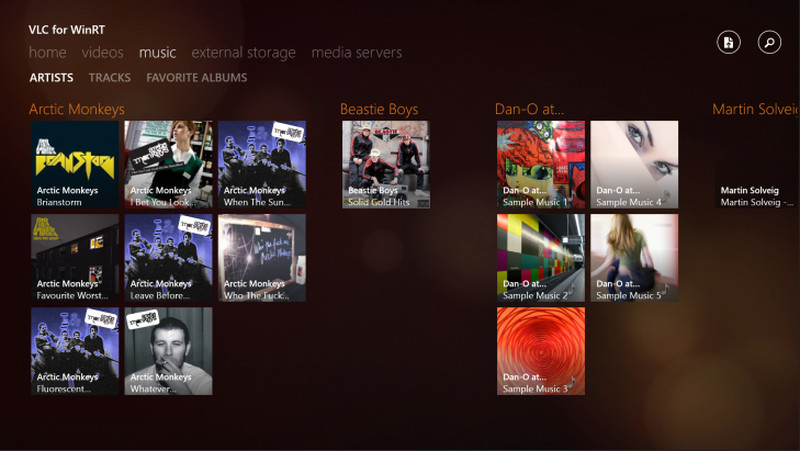
features a easy-to-navigate but complete UI, notably for audio browsing;
supports Live Tiles!
supports removable storage and DLNA servers.
However, there are a few limitations:
This app is currently slow, and is slower than VLC for desktop for video decoding and has no hardware acceleration;
Subtitles support is not very good yet, and notably it only supports embedded subtitles; this is our major point of focus for now.
Audio does not seem to work in all configurations;
Playlists and streams are not supported in the UI (they are present in the core)
There are a couple of hidden Windows tips, tips and keyboard shortcuts in order to make your workflow smoother and quicker, without a whole lot of effort on your section.
We have now highlighted just a few of the most respected methods in the gallery above. The majority of the tips apply to Windows 7, with the few exceptions mentioned on explicit slides. What’s your favourite Windows secret? Tell us in the comments section below.
1. Select and Focus Taskbar Applications
To select and focus applications in the taskbar, hold down the Windows key, press T, and use the arrow keys or type T many times. This permits you to scroll thru the pinned applications without ever touching your mouse.
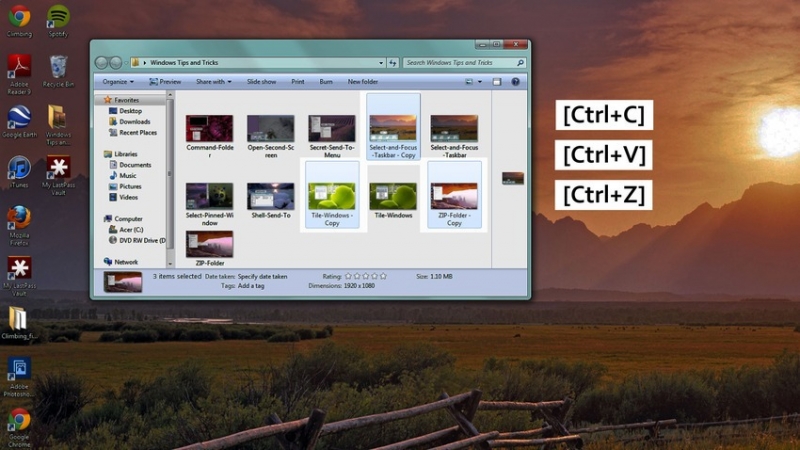
2. Copy, Paste or Undo a File Move
The general publicrecognizes that the key commands Ctrl+C, Ctrl+V and Ctrl+Z are handy for copying, pasting and deleting textual content, however, were you aware that you need to use these instructions for records data as neatly?
3. Tile Windows
With Windows, 7 got here Aero Snap, or the meansto maximise a window by dragging it to the side of the screen. However, what if you wish tosimply tile your windows?
Open TaskManager (Ctrl+Shift+Esc), choose the applications you are looking to tile (Ctrl+Click), rightclick, and select Tile Horizontally or Tile Vertically. Select-pinned-window
4. Open an Application
To start an application that’s pinned to the taskbar, hold the Windows key and press the number that corresponds with its location (Win+number from one to 9).
5. Manage Your Applications
To open a brand new window of the similar application (as an example, to open a brand new Chrome window or a second Desktop folder), hang the Shift key, the Window key and then a bunch from one to 9. If you wish toweb pagethru the open windows, press Control, Window, and a bunch, from one to 9.
6. Pin Any Item to the Taskbar
By default, Windows 7 only lets you pin applications to the taskbar. However,if you wish to pin a uniqueitem like a file or folder, follow these simple steps.
Drag and drop the file onto your desktop (If the item is in the Favorites folder, observe these additional steps)
Rightclick > New > Shortcut
Type in: explorer “C:shortcutsFavorites – ShortcutName.lnk”
Name the shortcut
The Shortcut will now appear as a folder, which that you mayrightclick to pin to the taskbar
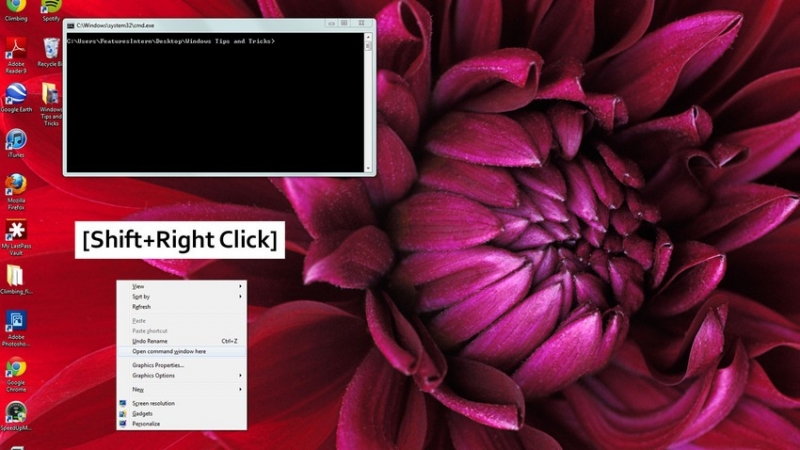
7. Open a Command Prompt
To access the open a command option, hold down the Shift key and right–click a folder.
This tip only works for Windows 7 or Vista. To do that on Windows XP, it’s a must to use a registry hack.
8. Get entry to the Secret “Send To” Menu
Were you aware that there is a secret “Send To” menu that you couldaccess with the Shift key? Hold down Shift, right–click the folder and select the “Send To” menu. This permits you toaccessa completely new set of file locations, so which you canquickly relocate a folder without the hassle.
9. Alter the Default “Send To” Menu
If you wish totrade the options that seemto your default “Ship To menu,” type “shell:send to” into the location bar of a folder. That you may then drag and drop new folder locations to the Send To folder.
10. Open Any File or Webpage
The Run Command is a simple way to open any file, application or website. Use the Win+R keyboard shortcut to open the Run dialog field. From right here, type in the title of any application and hit Enter. You couldadditionally enter a URL straight away into this container to open up any web page.
11. Create a Zip Folder
A zip folder is the quickest way to movea big selection of files. To create a zip folder, rightclicka standard file folder and choose the “Send To” option. The “Compressed (zipped) Folder” option will compress your folder and make it easier toupload the files in one fell swoop.
Good news for Flipboard users – one of the best modern RSS reader has finally made its way to Microsoft’s latest Operating System – Windows 8.1, making it utterly useful and productive tool for those who really want to stay in touch with their favorite content publisher.
Flipboard had promised that they will release the official app for Windows 8+ so that users could nurture the fruitful usage out of it.
Naturally, this version of Flipboard’s been tailored to take advantage of Win8’s gestures as well, so a swipe up provides buttons to subscribe, refresh, edit and flip things, while pulling down from the top lets you see additional content from contributors or stuff others are reading.
If you want to have an overview before downloading the app on your computer, We got your back:
Windows 8 has some effective tools which lets you interact with your PC architecture easily. There are many different enhancement and changes which can be confusing for the new users.
One of the new changes which is confusing for the users is the hidden option to disable or bypass the password prompt window. But, luckily there is a way to bypass the password screen. Here’s How:
1. Boot your PC and enter your password.
2. Press Win-X (by which I mean hold down the Windows key and then tap X).
3. In the pop-up menu that appears, click Command Prompt (Admin).
4. In the Command Prompt, type control userpasswords2, then press Enter. (If this sounds familiar, it’s because the same command works in earlier version of Windows.)
5. In the User Accounts dialog that appears, uncheck the box marked Users must enter a user name and password to use this computer.
6. Click OK, then confirm the automatic sign-in option by entering your password (twice).
7. Reboot your Windows 8 OS.
After reboot you will find that your Windows 8 finally understands that you don’t want to enter the password every time you boot your machine.
There has been a wide range of developments going on, which aims to create more eco-friendly buildings around us. Todays modern large and tall buildings has wider surface area for solar energy to be converted into the electricity — some scientists are working on the experiments to utilize this fact.
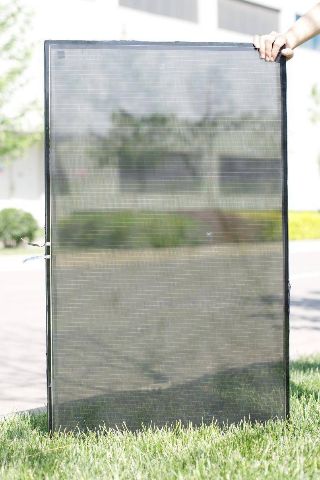
Transparent photovoltaics have yet to grace the face of your smartphones, but UCLA researchers are working on a new see-through solar cell that showing potential.
The new design uses a new type of polymer solar cell, which can help you design the solar window glasses to power the entire building efficiently in the future or manufacture a better solar collecting smartphones to charge them up automatically.
The team has been able to build a device that converts infrared light into electrical current. Current prototypes boast 4 percent energy conversion efficiency at 66 percent transparency — not so crystal clear, but certainly clean enough to peer through.
The technology is still a new kid – waiting to get into the adulthood — but we sure can expect a great amount of results from it. UCLA team said in a press release:
“These results open the potential for visibly transparent polymer solar cells as add-on components of portable electronics, smart windows and building-integrated photovoltaics and in other applications,” said study leader Yang Yang, a UCLA professor of materials science and engineering, who also is director of the Nano Renewable Energy Center at California NanoSystems Institute (CNSI).
“We are excited by this new invention on transparent solar cells, which applied our recent advances in transparent conducting windows (also published in ACS Nano) to fabricate these devices,” said Paul S.Weiss, CNSI director and Fred Kavli Chair in NanoSystems Sciences.
The team has to get some major issues to be fixed in the long run – like conversion rate per square meter and cost to manufacture the transparent photovoltaic cells. A 4% conversion efficiency equates to around 40W per square metre during the brightest part of a very bright day. Far too low for phone screens and even car roofs. The only way this technology can be made viable is if it can be applied to glass on the million-m² scale.
Whatever it is going to be, we sure are going to witness some futuristic technology undergoing the process of development.
what do you think? the technology can bring a wide range of possibilities for humans? or is it just another bunch of innovative idea which will never work practically?
The only way to do was through a bootable pen drive carrying windows. I thought that I knew the method to do that but when I tried it all failed. I even looked for the method online but all I could find were complicated ones and required a software or two. Another trouble added to the heap was that they were all from windows point of view but as a user of ubuntu I was stuck there.
Through this tutorial you can make a windows bootable pen drive anywhere anytime. It is so simple that now I think that I already knew it. yeah actually this was the method I kept forgetting and now when I remember it I can share it with you all.
steps you need to follow :-
1. Get a USB drive first but the drive must have space for the setup of windows you are intrested in making a bootable version of. For example if you wish to make a bootable USB for windows 7 then the USB must be of 4GB or above capacity as the setup size of windows 7 is about 3GB.
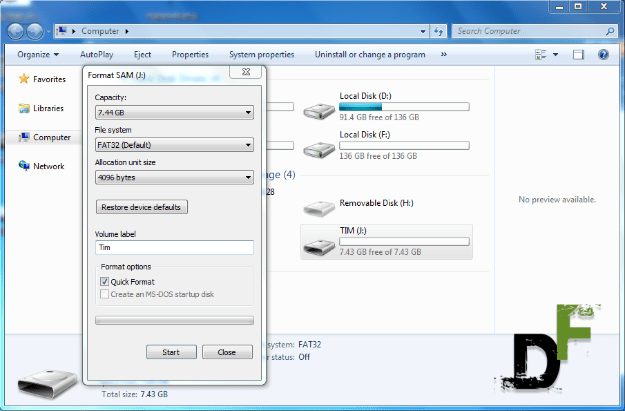
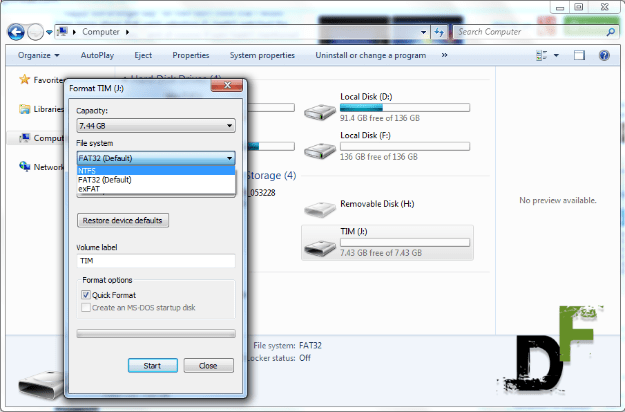
2. Format the particular USB drive into NTFS partition.If you don’t know how to do that the following steps will lead you to it in windows platform:- – Go to “My Computer” and select the USB drive you have connected in the system. – Right click on the USB drive and select “Format”. – A window opens up where you can select the type of partition you wanna format that pen drive into. Select “NTFS” from the file system option.
– Click on “Format” and you are done.
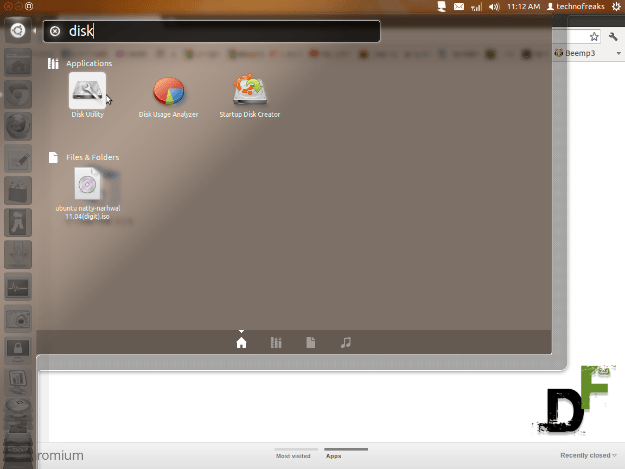
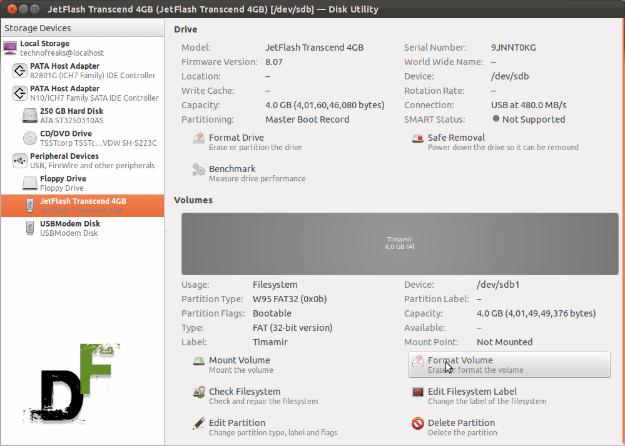
If you are anubuntuuser then you need to follow the following steps:- – Open your “disk utility” by searching it through the ubuntu dashboard. – There select your USB drive from the left-hand side panel. – Now in the right pane click on “Unmount Volume” – Next click on the “format volume” button. A new window will come up where select the partition type as NTFS and format your drive through the wizard. If your formatting is done then you are also good to go to the next step.
Now your USB drive is formatted in NTFS partition type we can move towards the third and final step.
3. For the last and final step of this tutorial you need to have the setup of the respective windows version, or you can even have the disc of that version. Just copy the whole setup of the operating system from that folder or CD and paste it into the USB drive. Don’t put the setup inside any folder inside the USB stick, just it paste it openly into the drive.
If you wish to use the left over space in the drive for carrying something then you can make any folder inside the drive and put the content there. So it is as simple as that. Your bootable pen drive for windows is ready. Just restart your pc and boot from the drive using boot menu and you can now install windows on that pc without any worries. And also for your information i would like to add that this method is not limited to those who don’t have DVD drives but should be used by everyone as the installation process speeds up and your disk is also not scratched much.
requirements:-
1. A USB drive that has enough capacity to hold the setup files of windows.
2. The installation disc or copied files of the same disc of windows.
Hope this tutorial solves all your troubles, as it clearly solved all of mine. If not then you can ask for any other help from us freaks here as Digitfreak is always here to help you out when you are in a digital puddle. Feel free to write your views below.
 Here are some of the features listed on the kickstarter page:
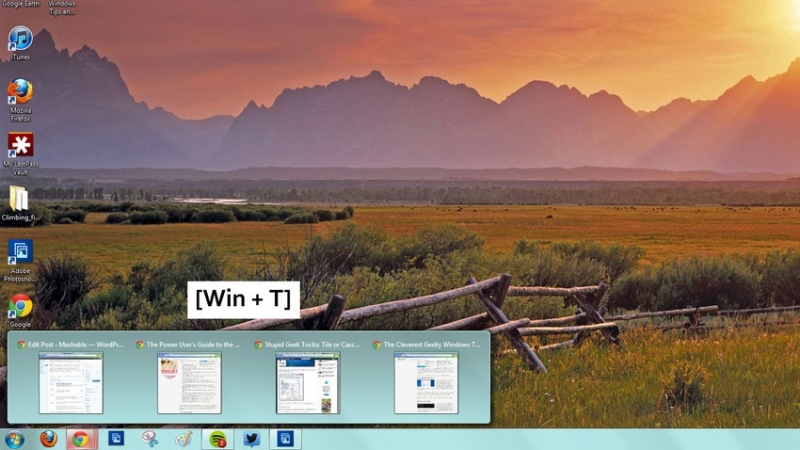
 The general public
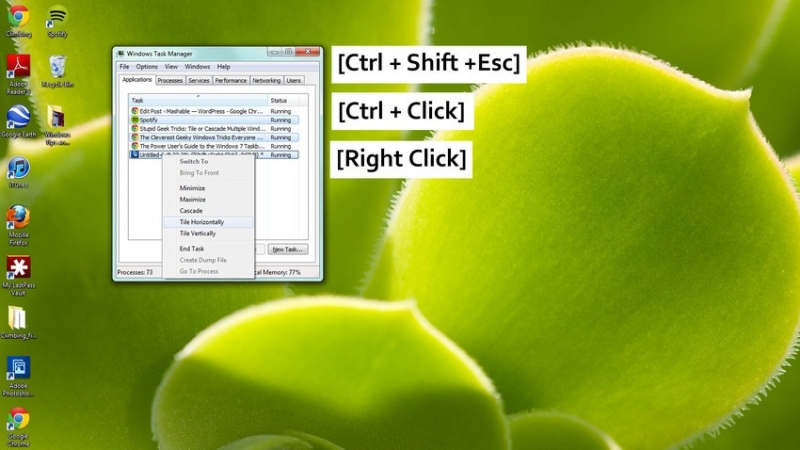 With Windows, 7
 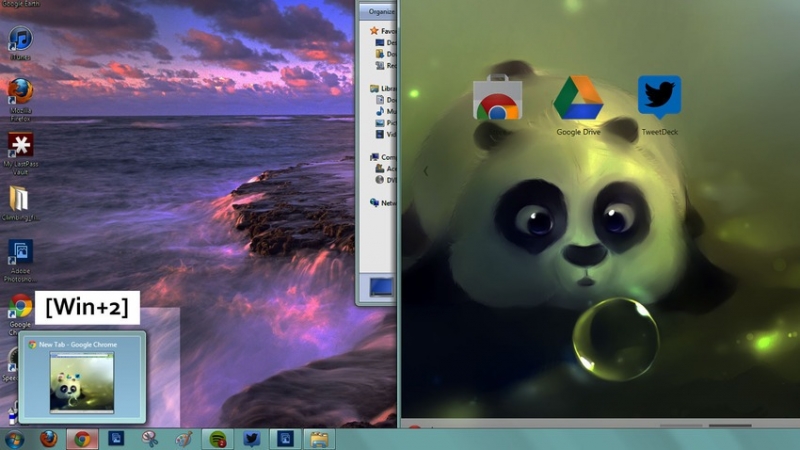 To start an application
 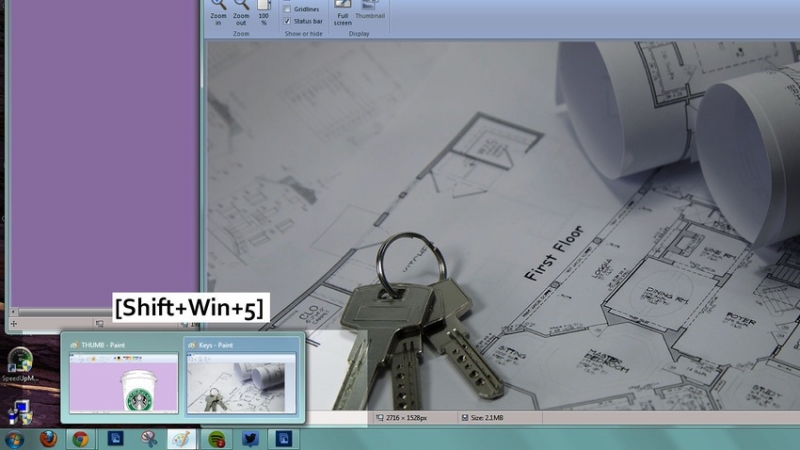 To open
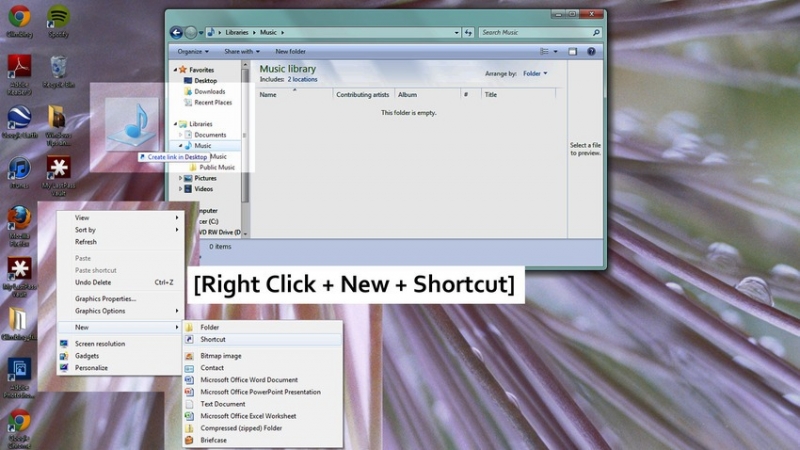
 To
To 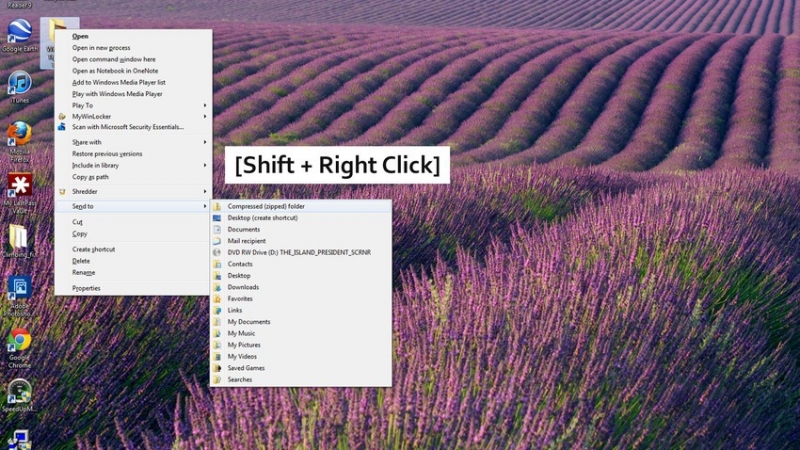 Were you aware
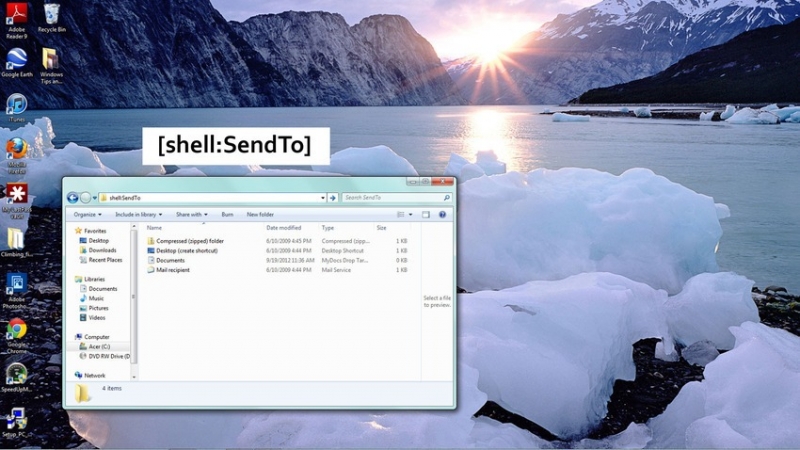 If you wish to
 The Run Command
 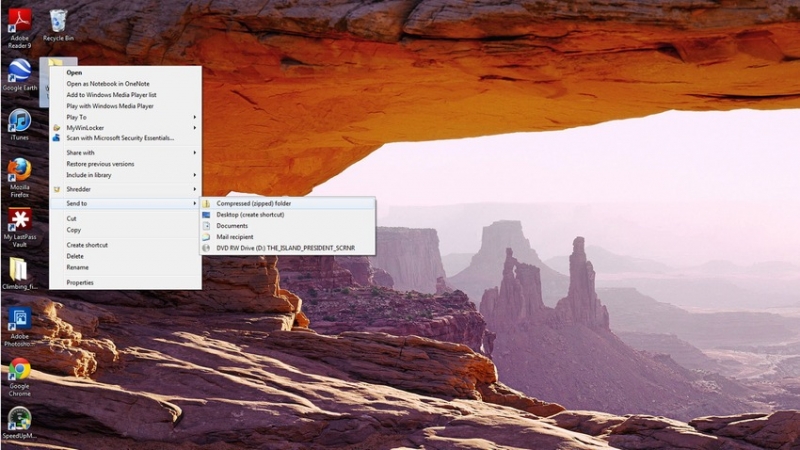 A zip
A zip![[How To] bypass or disable windows 8 password prompt/window](https://digitfreak.com/wp-content/uploads/2012/11/windows_8_user_accounts.jpg)
![How to make a bootable Windows USB anytime! [windows and ubuntu platforms]](https://digitfreak.com/wp-content/uploads/2012/02/thumb_windows 1.png)