Yeah, I agree there are some applications that can help you change the folder color and you can easily change the folder icon using the “properties” context menu.
But, have you ever tried to change the folder icon to your favorite image? The thing is that you can’t change the folder icon into the image you want it to be, simply because windows can only recognize the icons with it’s unique file extension — “.ico” – leaving you with the manual image conversion process.
Even if you are stubborn and want to do things manually, it would consume lots of time and needs some considerable amount of efforts to convert 100s of images into .ico file – and sometimes, you don’t get the good results with the image conversion tools, because they cannot retain the same image quality as the source file.
We came across a really simple and beautiful tool that accomplishes the same task, but with minimal efforts and a negligible amount of time. “Folder Changer” is the utility that can change the folder color according to your preference, and it does convert any picture/image into a folder icon.
Let’s have a look at the steps you need to follow to get this work.
Instructions
1. Download the software “FolderChanger” and install the software
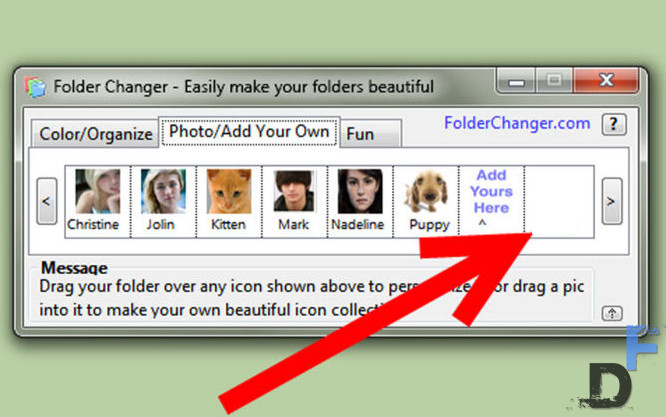
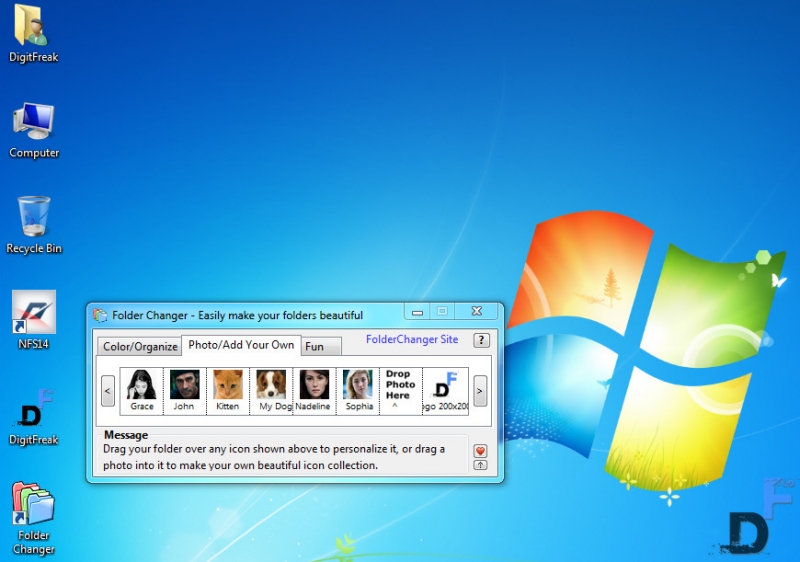
2. Select “Photo/Add Your Own” tab of FolderChanger.
3. Drag and drop your favorite photo into FolderChanger.
4. Wait a few seconds for PhotoChanger to convert your photo into an icon.
5. Drag and drop your Desktop folder over the icon inside FolderChanger.
There are a couple of hidden Windows tips, tips and keyboard shortcuts in order to make your workflow smoother and quicker, without a whole lot of effort on your section.
We have now highlighted just a few of the most respected methods in the gallery above. The majority of the tips apply to Windows 7, with the few exceptions mentioned on explicit slides. What’s your favourite Windows secret? Tell us in the comments section below.
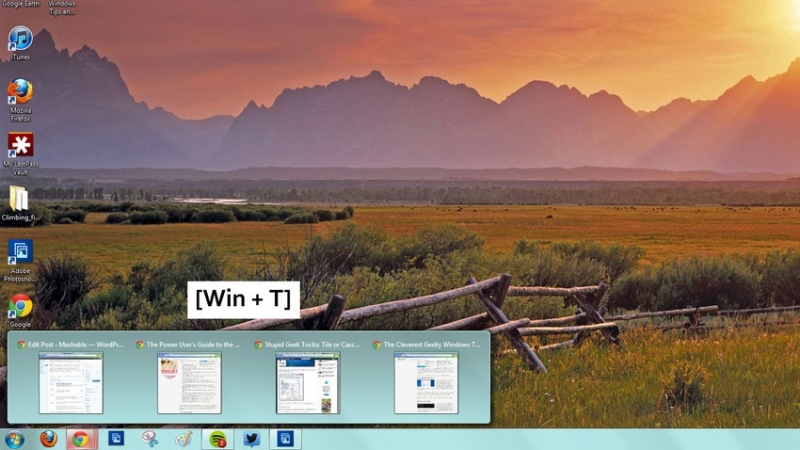
1. Select and Focus Taskbar Applications
To select and focus applications in the taskbar, hold down the Windows key, press T, and use the arrow keys or type T many times. This permits you to scroll thru the pinned applications without ever touching your mouse.
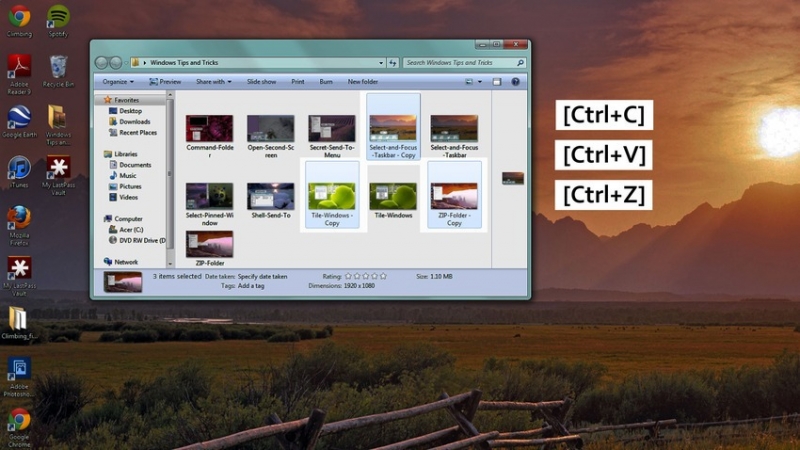
2. Copy, Paste or Undo a File Move
The general publicrecognizes that the key commands Ctrl+C, Ctrl+V and Ctrl+Z are handy for copying, pasting and deleting textual content, however, were you aware that you need to use these instructions for records data as neatly?
3. Tile Windows
With Windows, 7 got here Aero Snap, or the meansto maximise a window by dragging it to the side of the screen. However, what if you wish tosimply tile your windows?
Open TaskManager (Ctrl+Shift+Esc), choose the applications you are looking to tile (Ctrl+Click), rightclick, and select Tile Horizontally or Tile Vertically. Select-pinned-window
4. Open an Application
To start an application that’s pinned to the taskbar, hold the Windows key and press the number that corresponds with its location (Win+number from one to 9).
5. Manage Your Applications
To open a brand new window of the similar application (as an example, to open a brand new Chrome window or a second Desktop folder), hang the Shift key, the Window key and then a bunch from one to 9. If you wish toweb pagethru the open windows, press Control, Window, and a bunch, from one to 9.
6. Pin Any Item to the Taskbar
By default, Windows 7 only lets you pin applications to the taskbar. However,if you wish to pin a uniqueitem like a file or folder, follow these simple steps.
Drag and drop the file onto your desktop (If the item is in the Favorites folder, observe these additional steps)
Rightclick > New > Shortcut
Type in: explorer “C:shortcutsFavorites – ShortcutName.lnk”
Name the shortcut
The Shortcut will now appear as a folder, which that you mayrightclick to pin to the taskbar
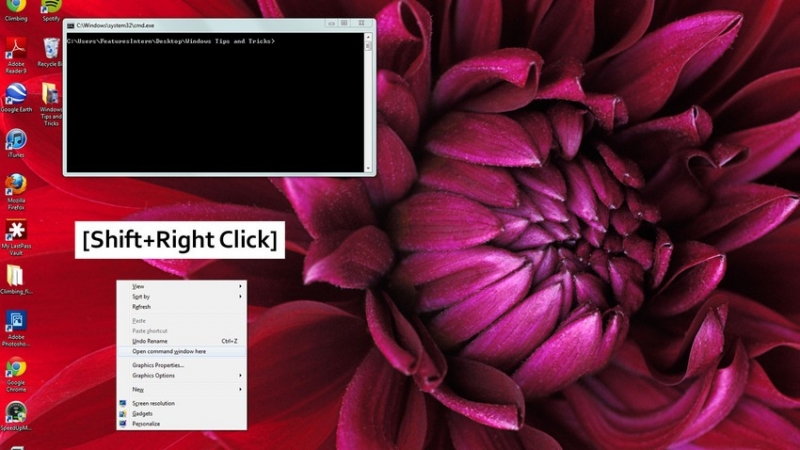
7. Open a Command Prompt
To access the open a command option, hold down the Shift key and right–click a folder.
This tip only works for Windows 7 or Vista. To do that on Windows XP, it’s a must to use a registry hack.
8. Get entry to the Secret “Send To” Menu
Were you aware that there is a secret “Send To” menu that you couldaccess with the Shift key? Hold down Shift, right–click the folder and select the “Send To” menu. This permits you toaccessa completely new set of file locations, so which you canquickly relocate a folder without the hassle.
9. Alter the Default “Send To” Menu
If you wish totrade the options that seemto your default “Ship To menu,” type “shell:send to” into the location bar of a folder. That you may then drag and drop new folder locations to the Send To folder.
10. Open Any File or Webpage
The Run Command is a simple way to open any file, application or website. Use the Win+R keyboard shortcut to open the Run dialog field. From right here, type in the title of any application and hit Enter. You couldadditionally enter a URL straight away into this container to open up any web page.
11. Create a Zip Folder
A zip folder is the quickest way to movea big selection of files. To create a zip folder, rightclicka standard file folder and choose the “Send To” option. The “Compressed (zipped) Folder” option will compress your folder and make it easier toupload the files in one fell swoop.
It is sure a very helpful software and makes our work easier and comfortably simple. Sometimes you might have been wondering, where IDM is storing all your files before presenting the final output you get after the finished download. Well, it is simple – Your files are unfinished and it should be in the temporary folder. Once you Know where to look, You are almost there.
IDM saves your cache files of incomplete downloads at this location:
C:\Users\digitfreak\AppData\Roaming\IDM\DwnlData
Replace digitfreak with your computer username.
You will find folders which are indexed by the names of your current unfinished downloads. This is what we were looking for. One thing that we notice is that these files have no extension.
If you are downloading multiple files at once, like a music album, you’ll find that there are exactly the same number of files without extensions. To get the preview of the files, you can copy one of them to other location and add an extension at the end.
Play or open the file with the software which can run it.
Warning
*Never rename the folder or file you are download in the temp folder of IDM or you might end up with the non-resumable download.
 The general public
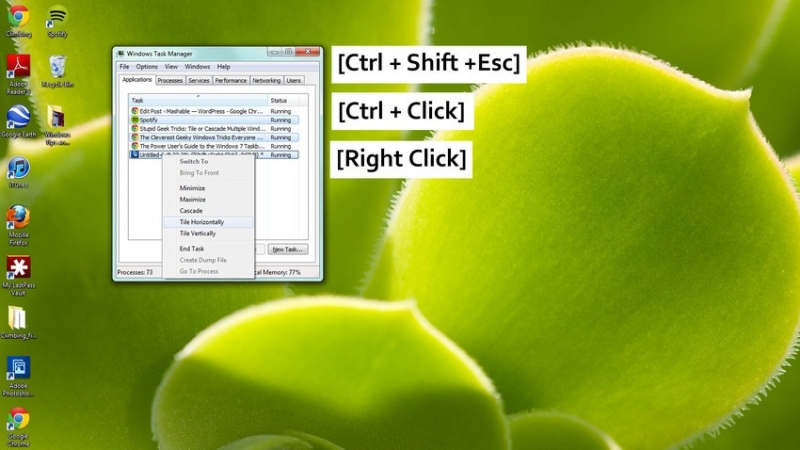 With Windows, 7
 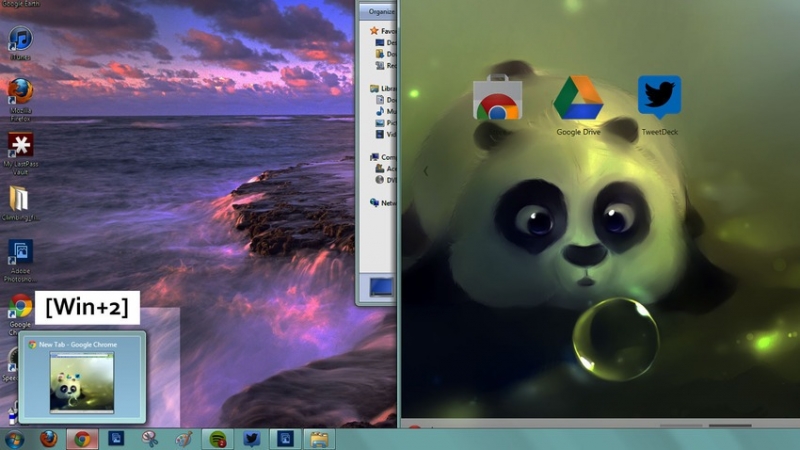 To start an application
 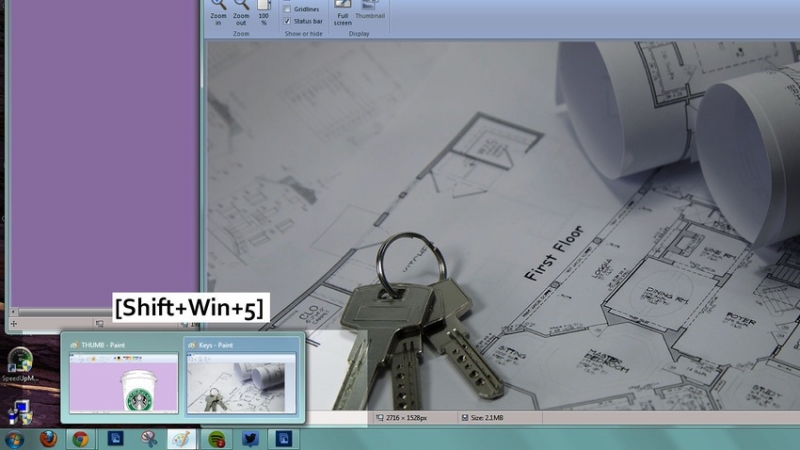 To open
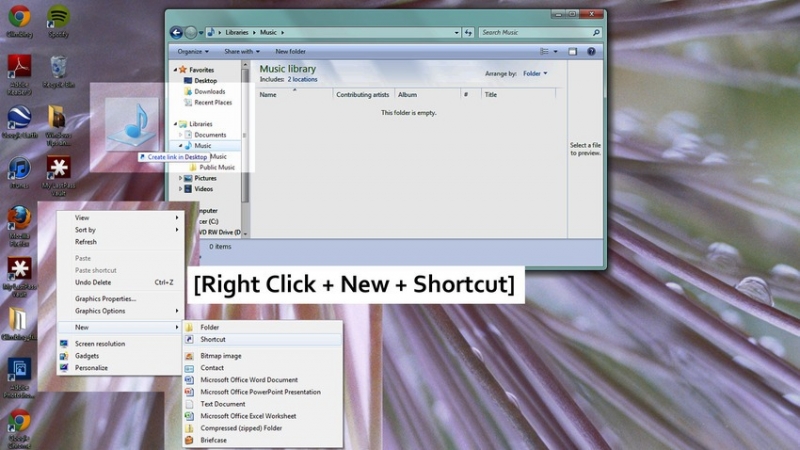
 To
To 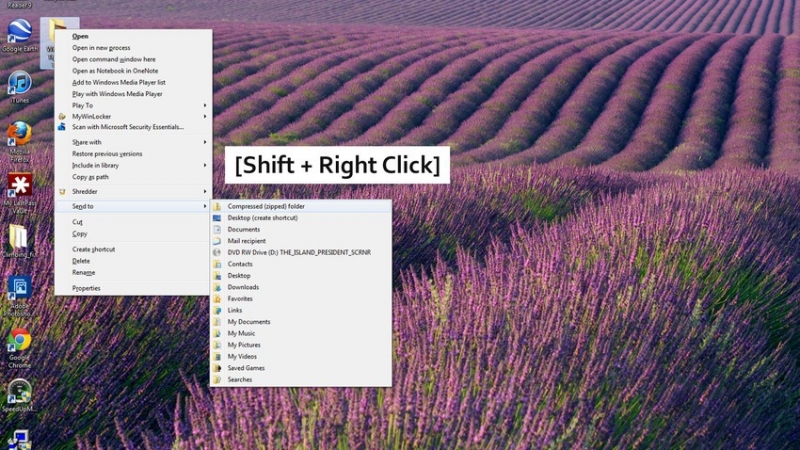 Were you aware
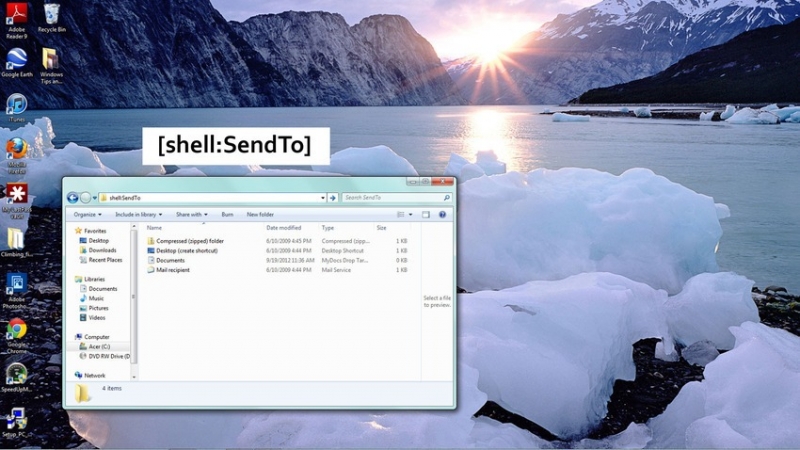 If you wish to
 The Run Command
 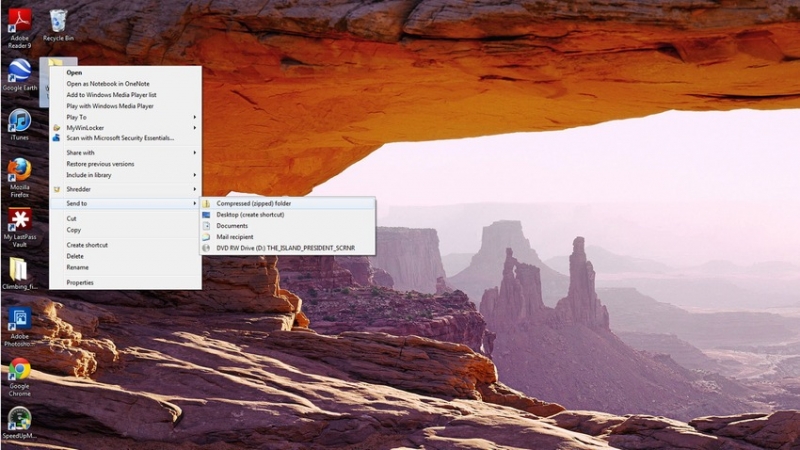 A zip
A zip![[How To] find temporary cache folder of Internet download manager (idm) for incomplete download files](https://digitfreak.com/wp-content/uploads/2012/06/Facebook-Posts.jpg)