There are dozens of third party security tips and tricks that can help you secure your android smartphone and make it literally invulnerable, but have you ever looked closely at the default security options and features on your device? There are few in-built features on android devices which can protect your phone from intruders.
To make sure that your smartphone is safe and secure, you should have used these 4 default security settings on your phone. These are the basic security setup which is essential for keeping your device safe from any vulnerability.
See Also: TrustoGo mobile security vs Bitdefender mobile security – Android app [Free vs Paid]
1. Enable default Lock screen
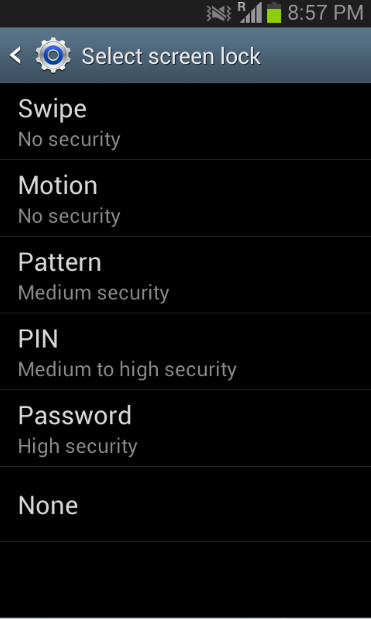 You should always lock down your device with the secure “screen lock” options available on your android smartphone. It is available at — settings > Screen Lock. You’ll find various options to lock down your android phone, which prevents non authorized person to access your personal data without your knowledge – your data will be secure when you are not using your phone or away from it. There was some vulnerabilities in the screen lock in the earlier version of the android phone, but it has been fixed in the android version released after Ginger Bread 2.3.6.
Make sure your device is running latest android Operating System, which usually fixes all the security bugs. If your smartphone is old and your manufacturer has abandoned the ship, you can simply try the alternatives – it’s time when you start experimenting on your device and install custom roms. You can be active on Xda-Dev Forum, which is a knowledge hub shared by programmers and developers throughout the world – who are ready to help.
2. Disable USB Debugging
 Make sure that “developer options” are disabled on your phone. This is the crucial region which is only meant for the programmers or app developers for the device. You should not play with the options here, unless you know what you are doing. One of the option in the “developer options” is USB debugging – which should always be disabled.
USB Debugging mode enables anyone to bypass the lock screen lock and access the data on your device without requiring to enter your pass code at the scree lock. To disable it simply go to Settings > Developer Options – and make sure the check box is not selected.
3. Enable Full Disk Encryption

If you require to turn on the USB Debugging due to some reason – you can still make your data secure and prevent anyone from accessing your data on your smartphone. Simple enable Disk Encryption on your device, so that no one can bypass the lock screen security before accessing the data on your phone.
4. Ensure your device is up to date
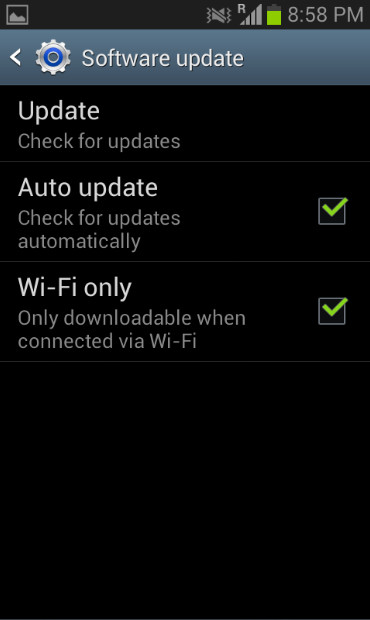 Android is always active when it comes to patching the OS security bugs. Always make sure that your device is up to date and synced with the server. Unfortunately, users are largely beholden to their carrier and cell phone manufacturer when it comes to this, but when you are finally prompted to upgrade your operating system, do so.
Sticking to your official firmware and keeping your device always up to date is the best way to minimize the security threats on your device. However, if your manufacturer has stopped releasing the updates for your device for a while – you can try the alternatives, but always make sure that it is from the reputed source. I suggest you to download the setup files from the known sources. The top custom rom contributor is Cynogenmod – which recently jump started their private company. CynogenMod Team has developed the custom Rom for hundreds of smartphones – making the device faster and secure. You can also rely on XDA-Forums, which is the hub of programmers and developers.
5. Use Google Play to download Apps
This is actually a tip or suggestion – always keep your android app access to Google Play store. I know it is quite attractive to download the apps from the internet for free, but at the end you don’t know what it is packed with. It might be a malware or virus program which is specifically designed to steal your personal data.This is far less likely, but an attacker can also discover your PIN lock (which is necessary for him to root your phone) if you accidentally install a malicious app that records your personal data, including PIN. Most malicious apps are distributed through shady Chinese/Russian app stores.
And always read through app permissions, as malicious apps typically make unusual requests. Most mobile security apps, like McAfee Mobile, Lookout Mobile, and F-Secure Mobile Security, come with an app auditing feature to help you keep tabs on permission requests.
![[How To] convert any image into folder icon [Images]](https://digitfreak.com/wp-content/uploads/2013/12/z_00002.jpg)
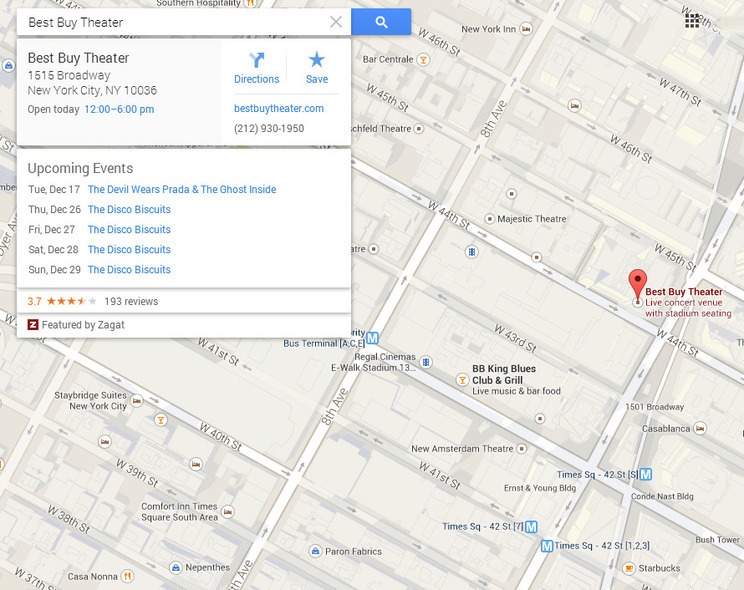 Whether going out in a brand new city or simply exploring your personal outdoor, finding events can take quite a bit of digging. Google Maps makes it a little bit more straightforward. When you select an event venue on the map, a listing of upcoming occasions will seem. From there, buy tickets or e-book passes to no matter you are involved in.
 All of us love Pegman, the little feature-less figure users can plop down on a map to look the street view. This instrument has some issues, although, as an instance when a truck blocks the entrance of a restaurant.
 It may be a ache to make use of Google Maps offline. It will probably take awhile to load and eats up an excellent quantity of data when you are no longer careful.
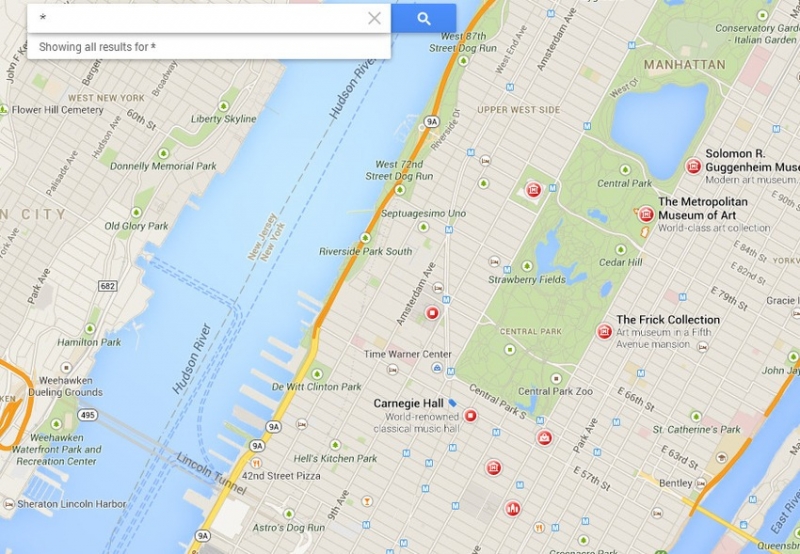 Not sure where to move or what to do? Unsure of the main tourist attractions in a brand new location? Let Google suggest some for you.
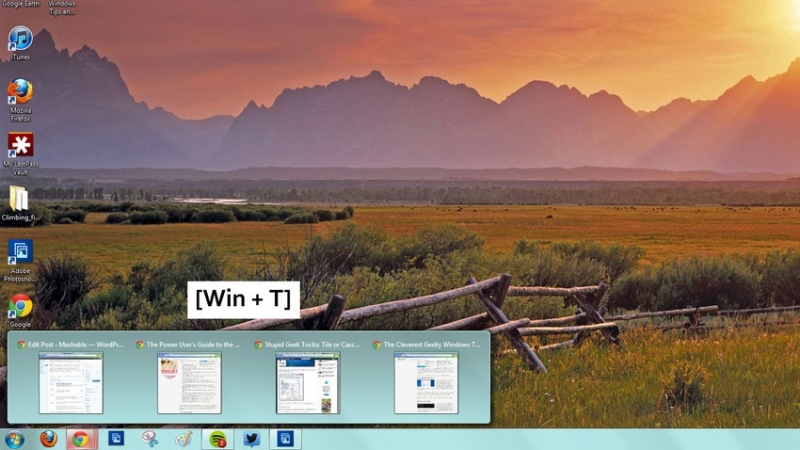
 The general public
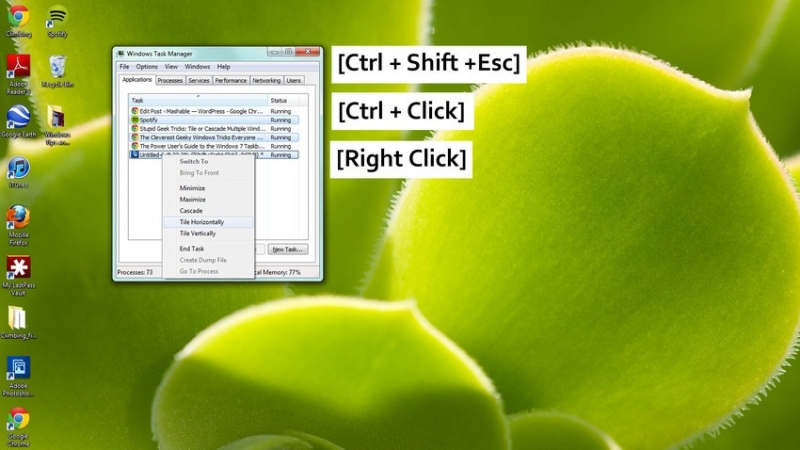 With Windows, 7
  To start an application
  To open
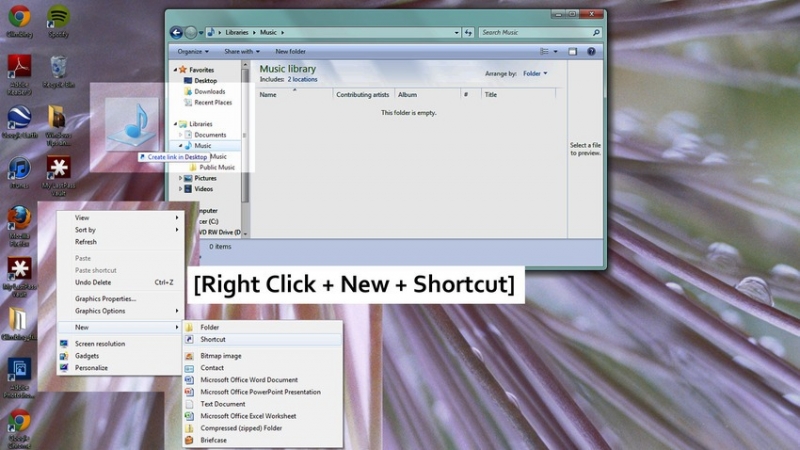
 To
To 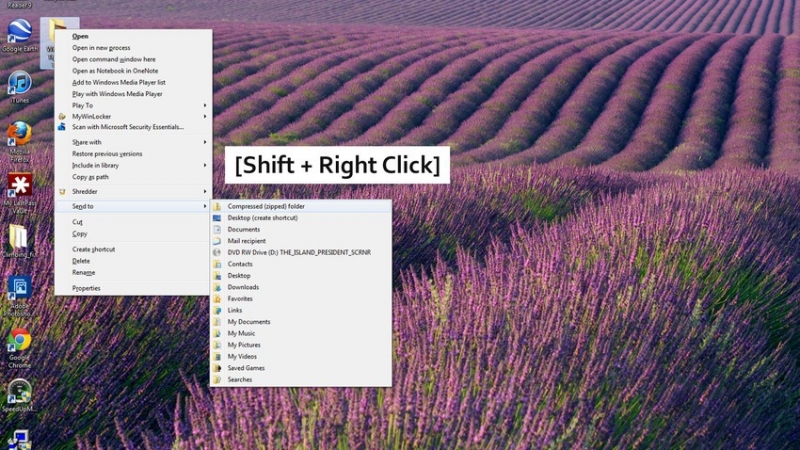 Were you aware
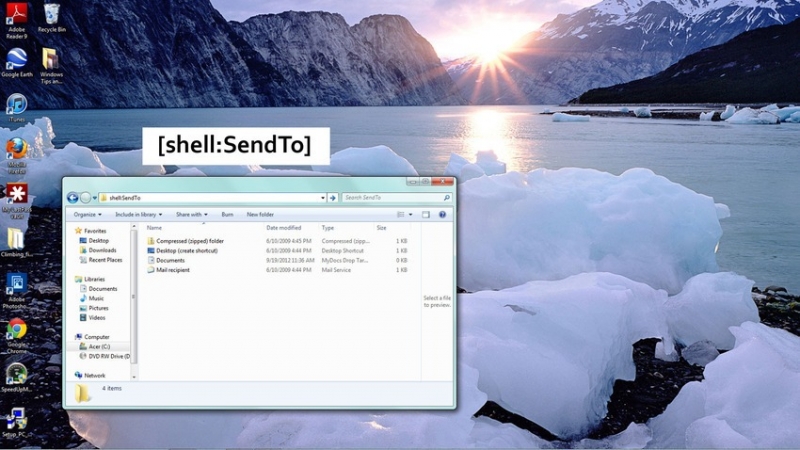 If you wish to
 The Run Command
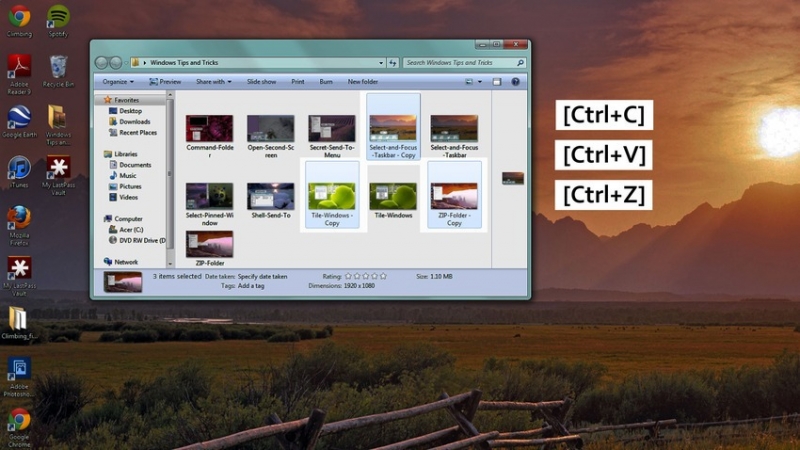
 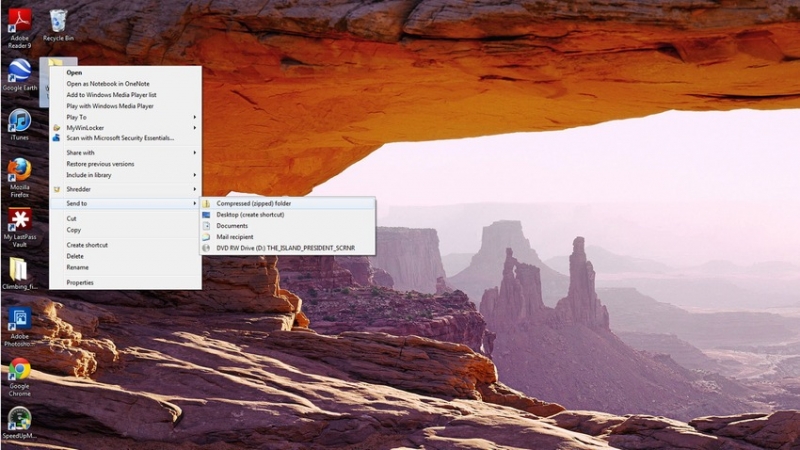 A zip
A zip