You have a huge crush on one of your friend’s ex-girlfriend and you used to visit her profile so often. You might think that nobody else knows your little secret – other than yourself.
There are lots of similar events you might have searched for – on Facebook which could be little embarrassing if you lookout for it now. You might even don’t remember what you searched in the past.
But, Facebook does…!
Facebook stores every single keyword you searched for in their database. Although, the privacy setting of this section is set to only you, but it might be little kinky to see all your searches stored at one place – even the embarrassing ones.
Here’s a quick step to delete your Facebook search history:
Instructions:
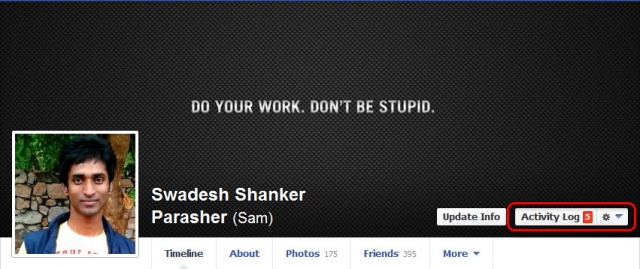 Step 1 – Go to your profile and click on “Activity Log” on the lower left corner of your cover photo.
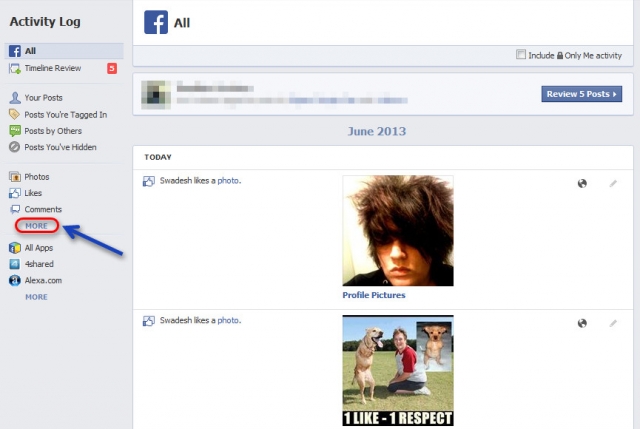 Step 2 – Click on “more” on the left side of the activity log to reveal the options related to your account. You have to focus on the third column – See Image.
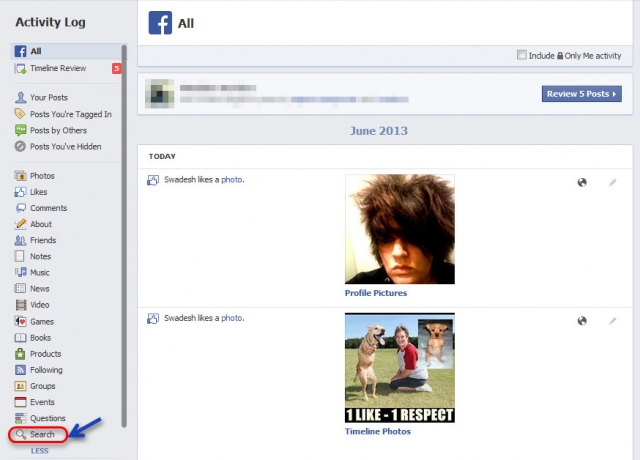 Step 3 – Scroll down the expanded list and you will see “search” as the last option. Click on it.
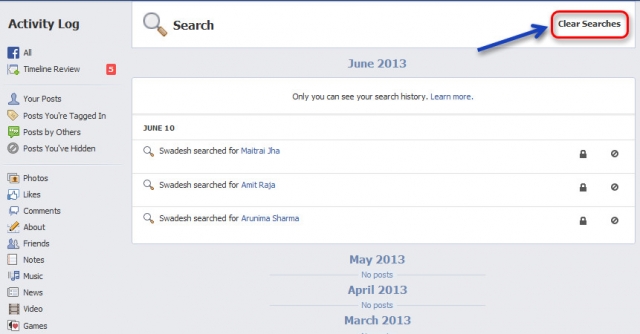 Step 4 – You can now view your Facebook search history, in date order. To get rid of it, simply click “Clear Searches”
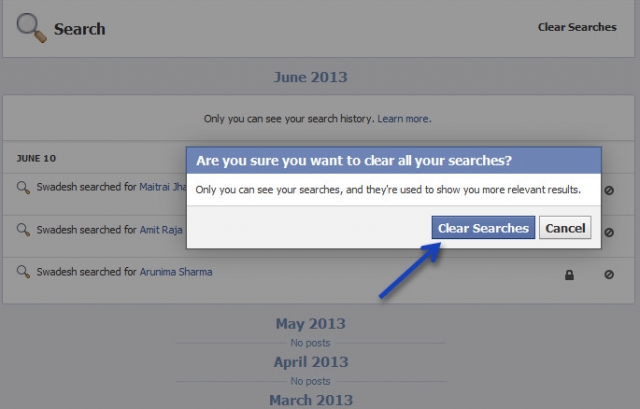 Step 5 – A new pop-up message will apear. Click on “Clear Searches” again – and you are done.