Every country has some sort of spying mechanism that monitors your activity online and stores the data that can be used against you. No matter how hard you try to keep something to yourself, you can’t hide it without any third-party services. This is where VPN (Virtual Private Network), Private DNS service and masked ip addresses comes handy.
See Also: [How To] access Netflix and other Geo-blocked channels from anywhere
Private DNS service is something new, which is not familiar to everyone, but other traditional methods are widely used to protect one’s privacy online. However, they still don’t ensure 100% security and privacy because these company’s has your original ip address log and access data, which can be accessed by the government in certain country under the law.
Recent NSA leak by Edward snowden and other surveillance system in different countries states that everything is being monitored. So, taking the steps to mask your online activity is essential for those who wants to keep their activity on the Internet a “secret.”
See Also: BEWARE! Someone’s watching you, NSA agent leaks info on secret surveillance program PRISM in US!
The simplest and most famous method to do so, is to use a VPN service. It hides your activity and changes the Geo-location of the originating system – wonderful, isn’t it?… But, the thing is that, how to choose from literally thousands of them? To sort the things out we tested “VPN4ALL,” which has been there for last 3 years. I have been using it since last 24 hours, so that I can sort the good, best and worst of it. Lets find out what we got:
The Registration:
 VPN4ALL is simple and robust service that provides traditional VPN mechanism to hide your online identity and keeps your “privacy” safe from the intruders. The first thing you would need is to get an account on their website. The registration process is simple and you won’t find any hassle while performing it. To make things clear, it is not a free service — you need to subscribe on the monthly, quarterly or yearly basis. (Register here).
Plans and Pricing:
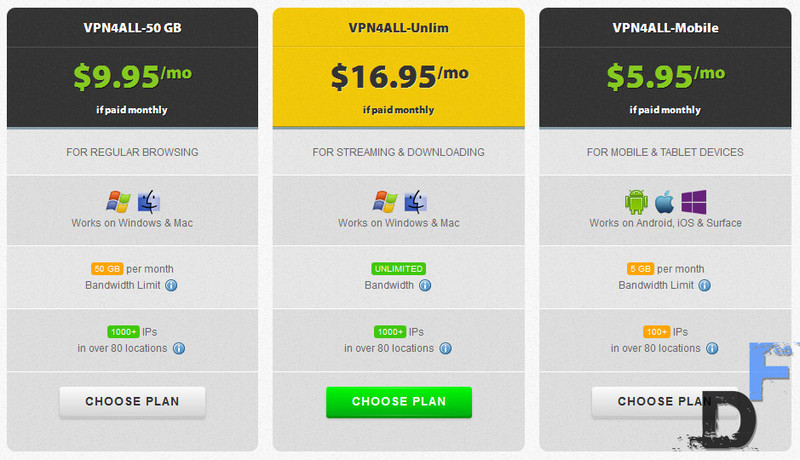 The website offers 3 basic subscription options – “For Mobile & Tablet devices,” “For Regular browsing” and “For streaming & downloading.” Each of them has different usage and data allocation that is suitable for the specific user group.
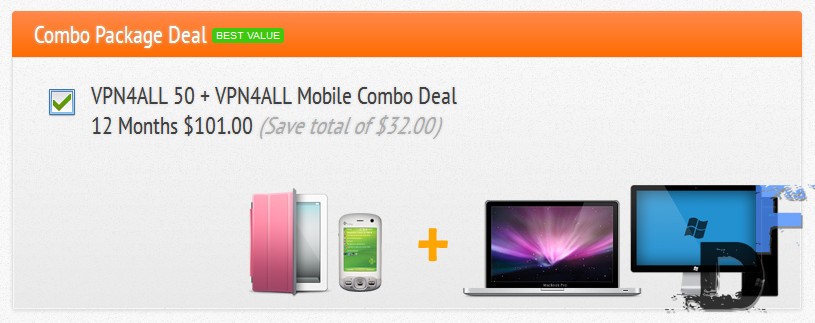
If you want to secure your computer system, but don’t want to use it to stream contents or download files — you can simply opt for “VPN4ALL-50GB” plan. It allocates 50GB/month for windows and Mac. You’ll have to buy additional package “VPN4ALL-Mobile” if you want to use it on your mobile devices as well — We choose both for a year subscription (which helped us save $32).
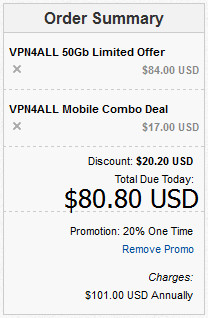
 When processed to the checkout, the VPN4ALL automatically offered us onetime “20% discount,” which minimized our overall cost to $80.80 (i.e. $6.74/month for 1 year) for both computer and mobile devices. The best thing is that, this discount is applicable for every new registration. To redeem the 20% discount you must follow this link – Register here.
 I was pretty happy that I would have to spend less from my salary. Pretty cheap, isn’t it? If you’re smart enough, you can buy the same package again with a new account once your subscription expires. pss! don’t let the VPN4ALL website know that you got this idea from digitfreak!
After checking out with preferred payment option (there are various payment option that includes PayPal, credit/Debit card, and bitcoin), I received several emails from VPN4ALL that included account details, License key for windows software and mobile app key.
Downloads
I found account details in my email, which helped me log into client area. You’ll find details about your subscribed package and license key in your account. The email sent by them has full detailed information about the service and how to use it.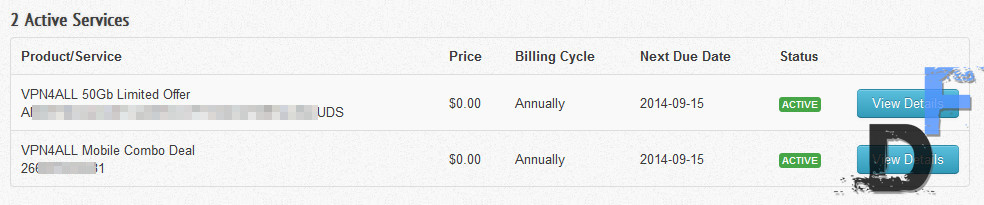
You can download the setup files and android application on their download page. I found it little difficult and annoying to download the setup file. There were two weird restriction — the download was not resumable and it had speed throttling issue. I never reached the maximum download speed that my ISP provides. Additionally, while downloading the file, it timed out once – forcing me to download the setup again from the beginning.
First, I thought it might be the issue with the ISP and Geo-location of the originating server from where I am downloading the files, but other digitfreak writers and staffs confirmed that they experienced the similar issue — not being able to get the good speed and download being timed out.
However, you can breath a sigh of relief because the windows setup is only ~48 MB.
Using the VPN
Setup:
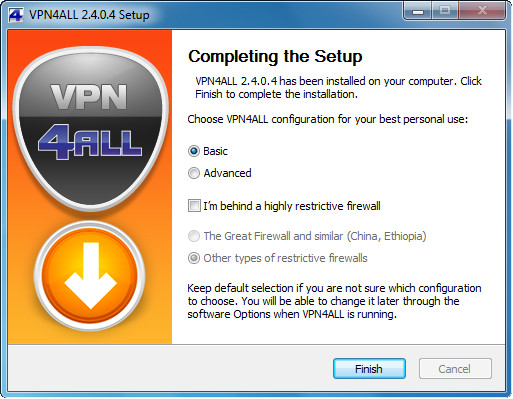 The setup process is anything like installing other software — you just need to agree to the terms, click “next” several times and “Finish” at the end. There nothing you will have to take care of while installing the software. When installation completed, the setup offered us to choose from two configuration — “Basic” or “Andvanced”. I just choose basic one, and clicked on “Finish.”
Windows:
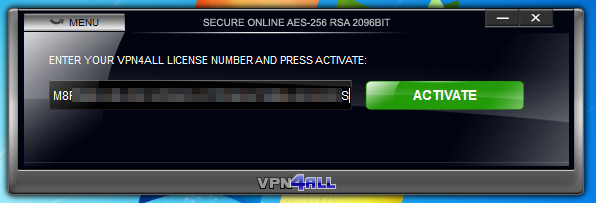
When you run VPN4ALL for the first time it will ask for the activation key. You bought the software, so they have already sent you the activation key. Just visit your account and copy paste your activation key to use the service.
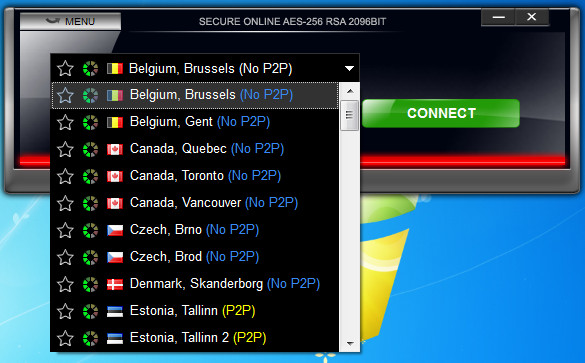
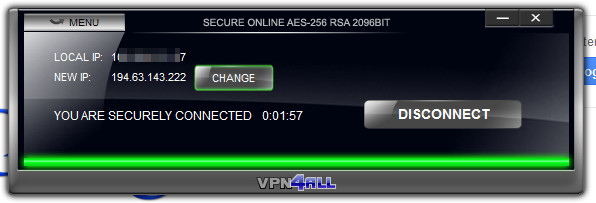
 Once activated you’ll find a really simple and effective layout that allows you to transform your internet connection into a secure network. You’ll find a drop down menu that has dozens of ip addresses to choose from — selecting one of them and clicking on “connect” button quickly connects the computer to the server for data encryption and tunneling. I was pretty impressed with the simplicity of it. It changes your “visible to the world” IP address and protects you against online snoopers and intruders. — All in one click!
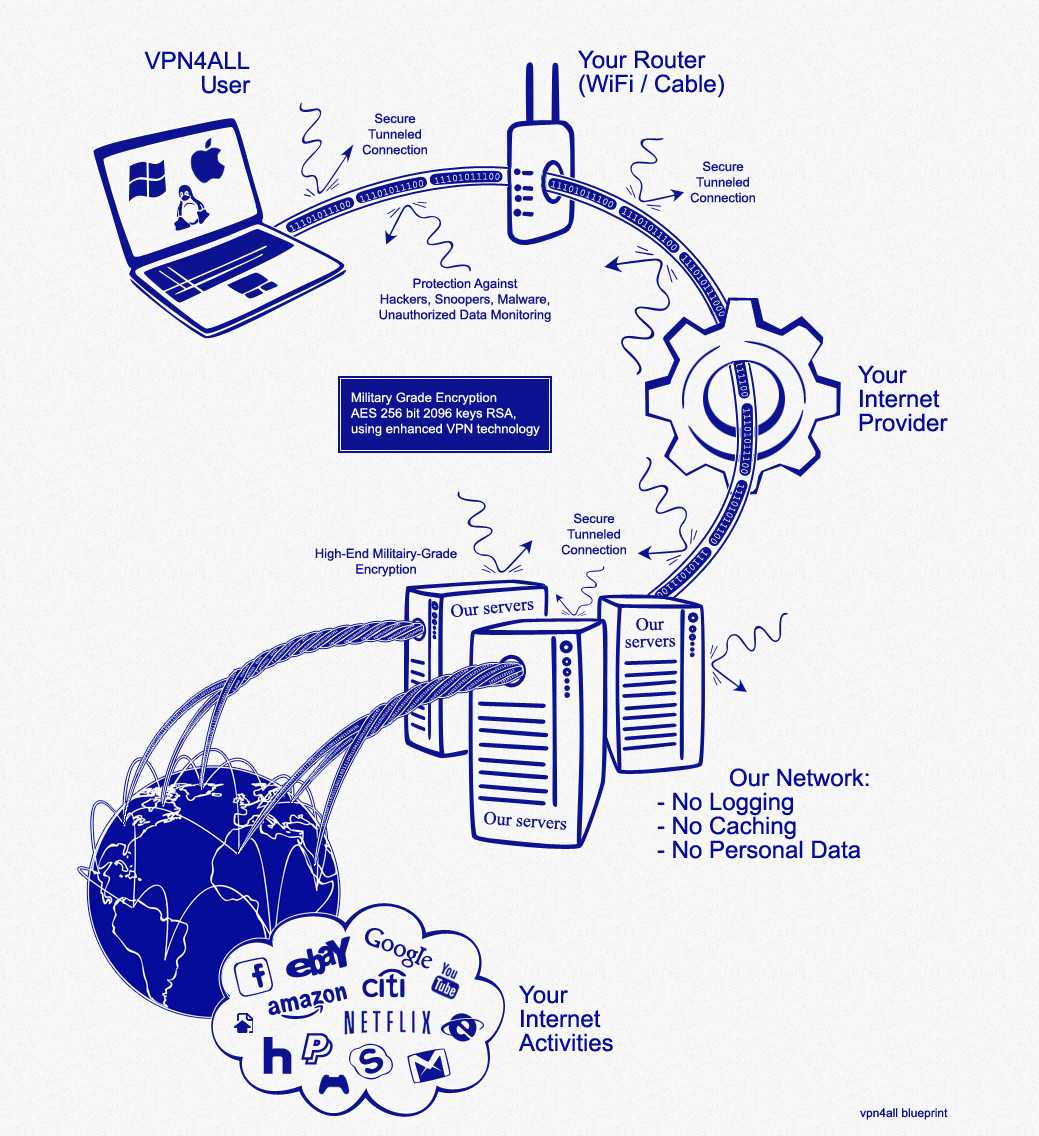
 VPN4ALL uses enhanced OpenVPN to ensure that (1) all your Internet traffic is encrypted with military-grade encryption as it’s transmitted over the Internet and that (2) your digital ID (IP address) remain invisible to the worldwide web at all times.
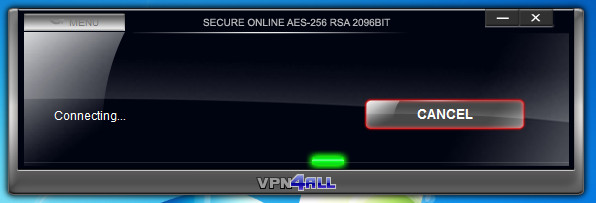
Every time a user connects with VPN4ALL, 2096 bits of random numbers are converted into a unique pair of keys for each user and for each session — one private key and one public key. These two keys are mathematically related in a very useful way. Data encrypted with one key can only be decrypted with the other key in the pair, and vice versa. This means your data is safe and can only be encrypted at VPN server to return your request.
 With secure Military-grade encryption, data tunneling, secure DNS, random IPs and masked Geo-location — you are ready to go. You can worry less about being exposed to most of the security flaws and organizations/hackers spying on your internet behavior.
Android:
Android Application is simple and effective, it is minimized to keep things simple and yet powerful. You can download the android application (.apk file) from downloads page mentioned above. Just install the application as you would do with other .apk files — i.e. run the setup and click on “install” on your android device.
Just like on windows, When you first run the application it will ask the account details of the user credentials to activate the application. Enter your registered email ID and license number provided by the VPN service and login. You’ll find a simple user interface that allows you to connect to the VPN without much hassle. If you are advanced user, there are some optional setting to play with — selection locations (globe icon) and settings (tweak icon).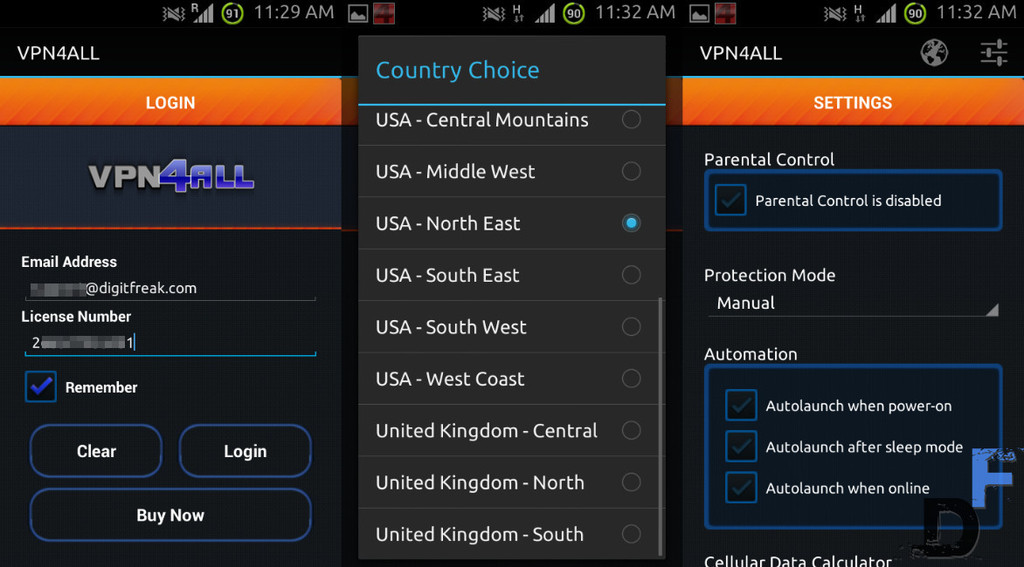 I left all the settings to default and simply slide the toggle button to activate the VPN on my android device. It quickly connected to the server and I could confirm in the notification area that I am connected to AES 128 bit secure connection that is now encrypting my data over my internet. At first, the surfing speed was real slow – so, I had to manually switch to the Geo-location that is nearest to my current location and I was good to go.
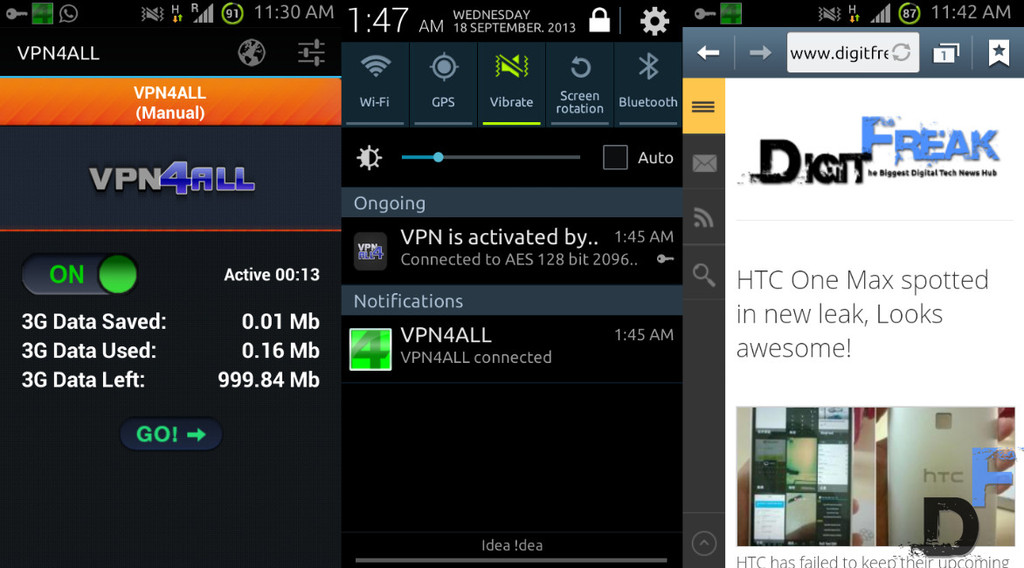
I visited several websites and services to make sure that VPN is actually working. To my surprise everything went so smooth that I didn’t felt any difference. In 5 minutes I was able to encrypt my internet connection on my mobile phone and successfully secured my privacy.
Benefits
So, you are ready with the robust and reliable VPN service and your internet is now secure, but do you really need this? What are the benefits you would achieve by opting for the private VPN service? Let us try to solve this riddle:
- VPN service is necessary if you don’t like the idea of government and other private organizations spying on your activity on the internet. If you want some privacy and data protection you can rely on reputed VPN service.
- VPN doesn’t only protect you against unwanted privacy violation, it also blocks eavesdropping and data spoofing.
- VPN sometimes gives better access to the content, which is faster and more efficient.
- It allows you to access websites and online services that is Geo-blocked or not available in your country. You can access the data more fluently and lifts restrictions.
- It bypasses all the ISP restriction that might be there in your country, which helps you access the internet without any restriction and hence reinstate freedom.
- VPN4ALL encrypts data with AES 256 RSA 2096-bit military level protection, which ensures protection of data from hackers and intruders.
- You can lift blockage (if any) at your school, offices or any public internet access hub.
- Whether downloading legally or illegally, you don’t want to find yourself on some company’s witch-hunt list just because you have a torrent app installed on your computer.
- VPN gives you a perfect opportunity to download through our secure VPN servers in complete privacy, security and anonymity. VPNALL servers are placed in p2p-friendly locations and are connected to high-speed channels (up to 10 Gbps) from the world’s largest data centers.
- You can hide your local ID and Geo-location.
- Securely use your credit card and/or PayPal account even on an unsecured Internet connection.
- You should definitely use VPN4ALL when you travel or on the go and connect to an unsecured / untrusted network.
- and more…
If any of the above bullets gets through your wall of requirements — You need a VPN service! and VPN4ALL provides just that.
Before using VPN: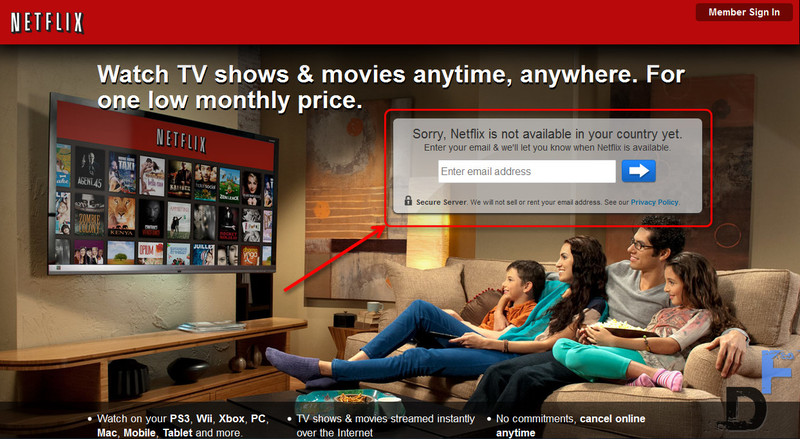
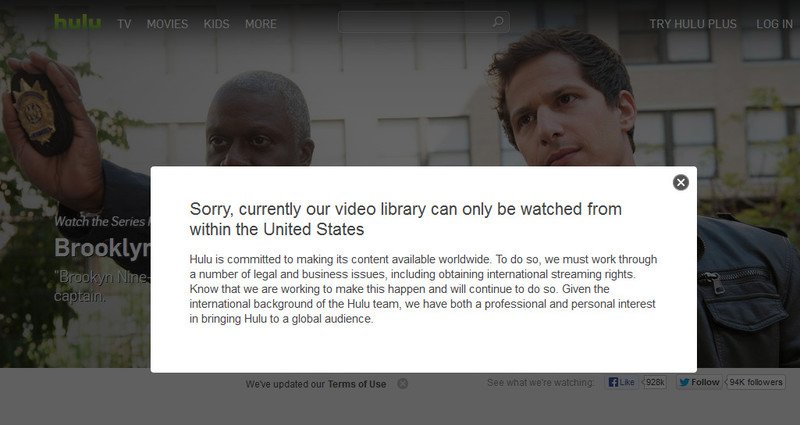
After using the VPN service by VPN4ALL, I could access all the digital content online, like Netflix and Hulu:

Verdict
The Internet is a huge community which promotes freedom and human rights. Everyone should have the ability to choose between privacy and anonymity of internet activity — VPN4ALL is capable of doing just that.
The simple and robust service provided by them works well on windows and android atmosphere. Both platform has simple user interface and lets you switch between VPN and unprotected connection easily. There is some hiccups at downloading the setup file from their website and it takes some time to choose the right IP address that works best for you, but once you have tweaked the settings and selected the right Geo-location and ip address – you are good to go.
You can access restricted and geographically blocked internet services within minutes — protecting your online identity.
If you are looking for the anonymous and secure internet access, you should go for it.
Rating: 8/10
![[How To] Schedule downloads using Internet Download manager](https://digitfreak.com/wp-content/uploads/2013/09/701300064.jpg)
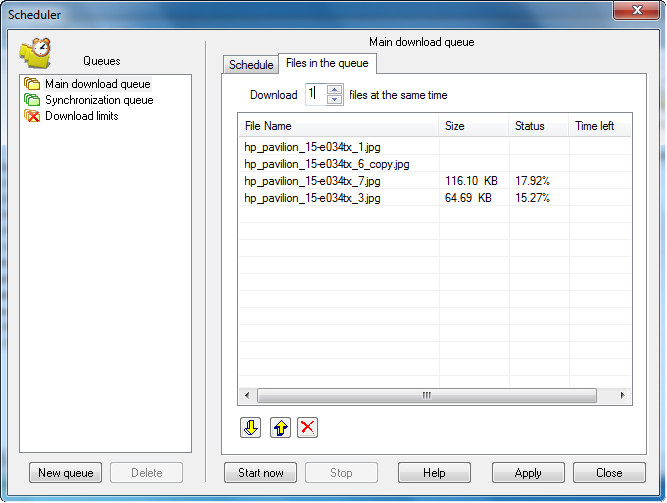
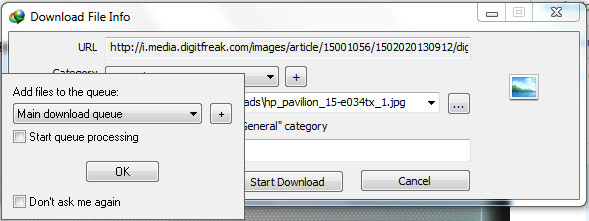 By default “Main download queue” will be selected, and you can start processing the queue right away if you check the “start queue processing” right before clicking on “OK” button. You can also check “Don’t ask me again” to remember your preferred setting.
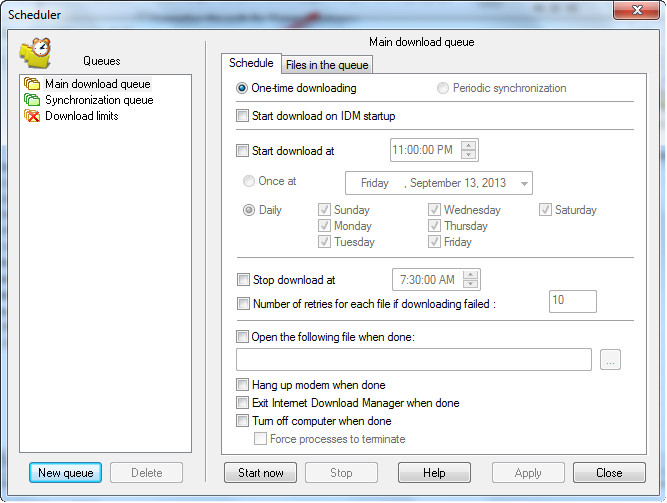 There are two types of scheduling options – “One time download” and “periodic Synchronization.” — As the name suggests “One Time Download,” processes download queue and deletes files from download queue when their download is complete and “periodic synchronization,” IDM checks if the files in the queue have been changed on the server, and if changed, it will download new files and replace old on new ones. All files will stay in the queue after synchronization.
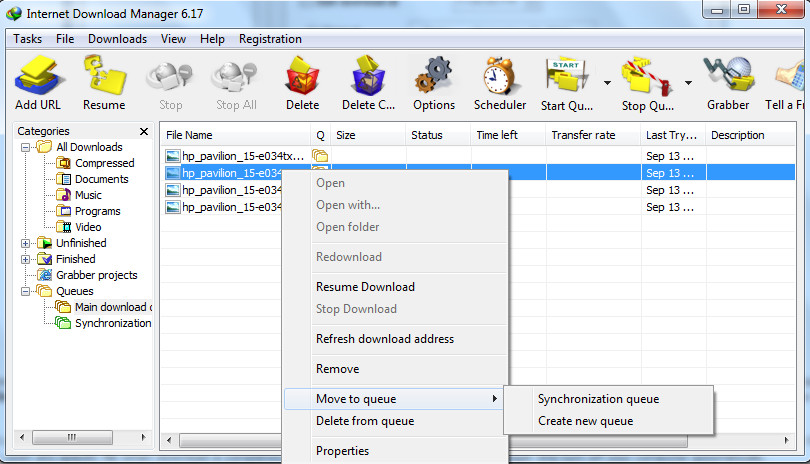 To manage the queue and files, click on “Files in the queue” tab. You can change the order of downloads for one or several selected files by using arrow buttons or by using drag & drop. You can also delete download tasks from the queue with Delete button.